Hop on over to MY NEW BLOG! I have decided to give Wix Blog a try. I like that it works seamlessly with my Wix website and shop.

I love your comments and I hope to see you there!


Hop on over to MY NEW BLOG! I have decided to give Wix Blog a try. I like that it works seamlessly with my Wix website and shop.
I love your comments and I hope to see you there!
This weekend I created a new website and I am excited to share it with you! You may have noticed that I have been refreshing my visual identity recently, especially if you follow me on Facebook.

I have been using my blog as my main site for 10 years and thought it was well past time for a change. I heard about wix.com last week and decided to try it out. It was easy to use and with the drag & drop features, I was able to make it exactly how I had envisioned. Stay tuned for changes to my blog too.
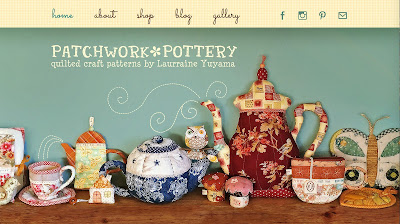

Please visit my new website by clicking the image below and let me know what you think. Do you have any suggestions on how it could be improved? Join my mailing list to receive updates & special offers as well as 10% off your next pattern purchase.
Enjoy your afternoon tea & quilted crafts :o)
Happy Autumn & Happy Thanksgiving to my fellow Canadians. Cozy up in your comfy chair with your favourite quilt, a cup of tea, and a piece of pumpkin pie while raindrops tap on the windows.


I baked pumpkin pies yesterday. Pumpkin is my favourite pie but I rarely get to enjoy them. Guess what I ate for breakfast today?!
These ones are made with almond milk! For the crust, I used 3-2-1 Pie Crust; measuring by cups, omitting the salt & sugar and using Vegan Becel as the fat. You can find the pie filling recipe at the bottom of this post.


I love Autumn! I love the colours and the smell, and the cooler weather. I love the sound of leaves crunching as I walk. I love leaves in general... all year long but mostly in Autumn when the colors burn to a warm flame! I will be making a pattern for this little Autumn Trivet introducing the technique of cut-away appliqué.


This beautiful wool felt bird has been standing guard over my little egg basket of twine for more than 8 years! I cherish my bird & oak leaf, as well as my pear & felted acorns. Check out all of Lisa’s wool creations at Lil Fish Studios!


I am looking forward to using this stash of wool that I have been coveting for years. Perhaps the leaves will inspire me? I updated the look of my SHOP recently. Pop on over to check it out... there is still time to sew some Pumpkin Coasters!


I hope you are all enjoying this time of year as much as I am. Stay warm & cozy, and join me for tea, pie & crafting!
{PUMPKIN PIE}
makes 1 large deep dish pie or 2 regular shallow pies
3 cups pumpkin
3 eggs
1/2 cup brown sugar
1/4 cup maple syrup
1 1/2 tsp cinnamon
1/2 tsp nutmeg
1/2 tsp ginger
1/4 tsp cloves
1/4 tsp mace
3/4 cup almond milk
(This recipe uses more pumpkin & spices, and less sugar than most.)
Whisk together and pour into unbaked pie crust. Bake 425F for 15 min & 350F for 45 min or until filling is firm. Thin pies will be ready sooner. Serve with coconut whipped cream!
I use 3-2-1 pie crust recipe made with Vegan Becel. It’s a soft dough that doesn’t shrink. Add flour to make cut-outs. Bake cut-outs until lightly browned and place on pie once filling has firmed.

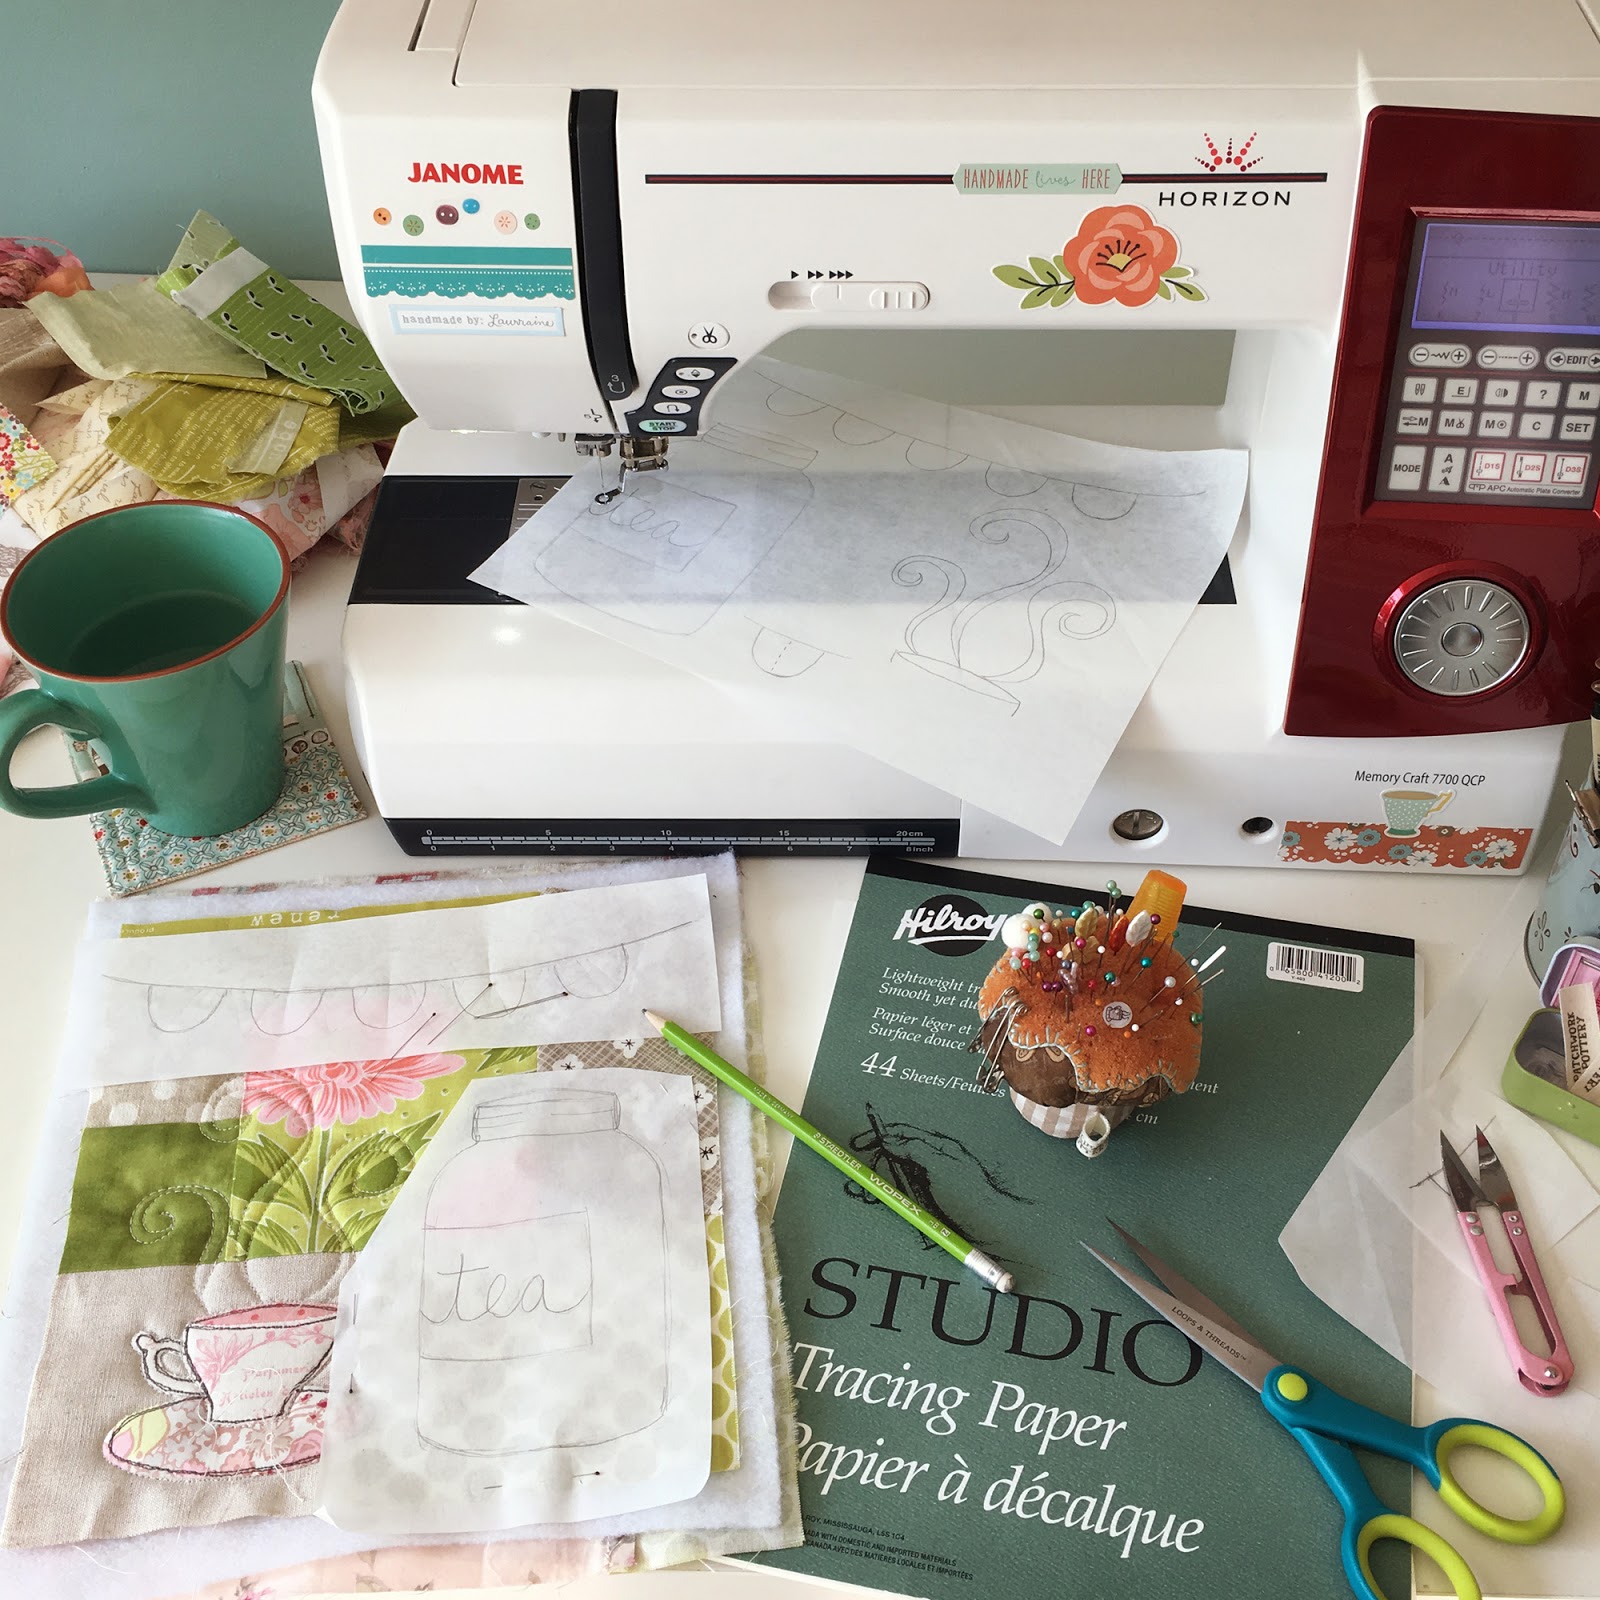
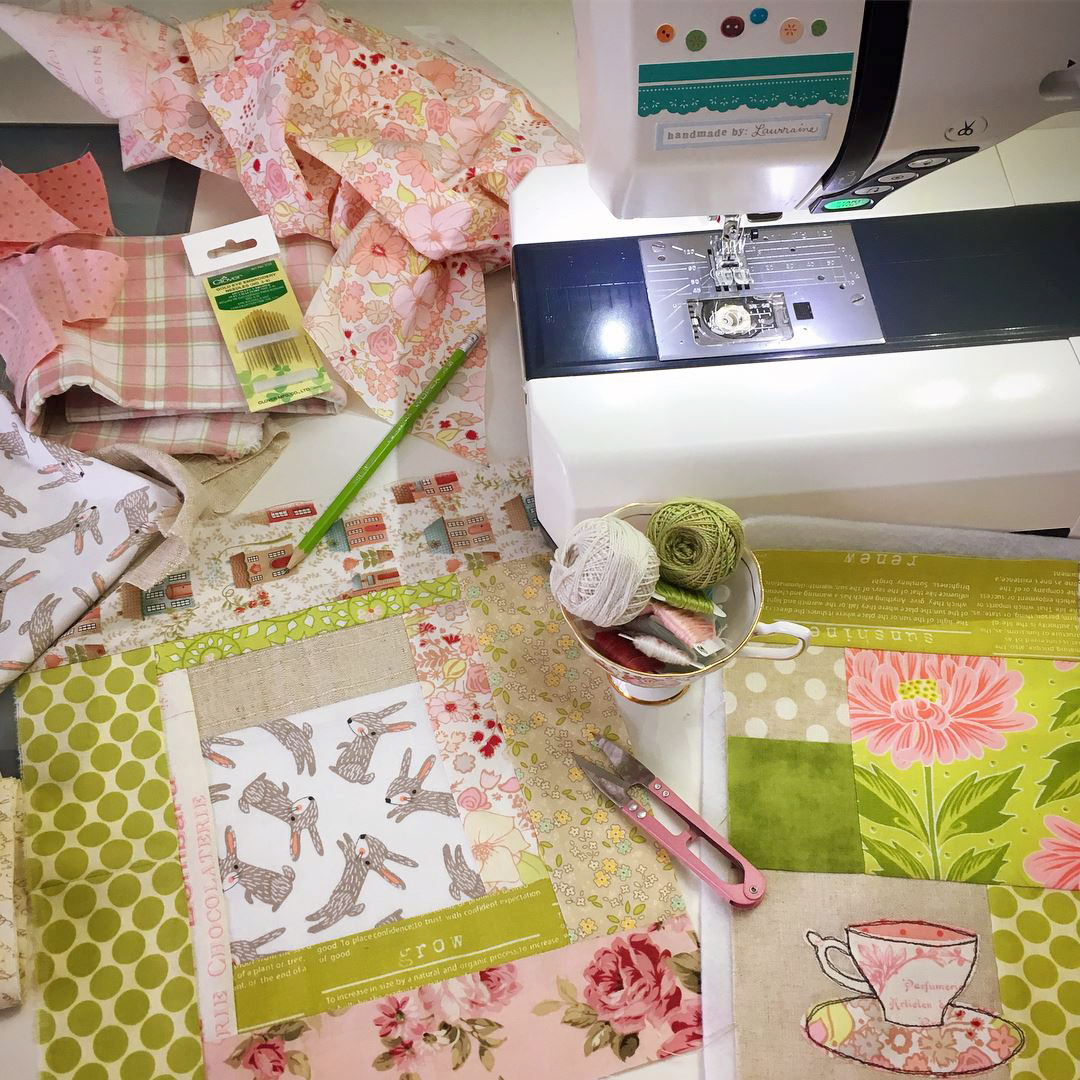
Last week I made this mugrug as a practice patchwork block to get me back into the swing of things.
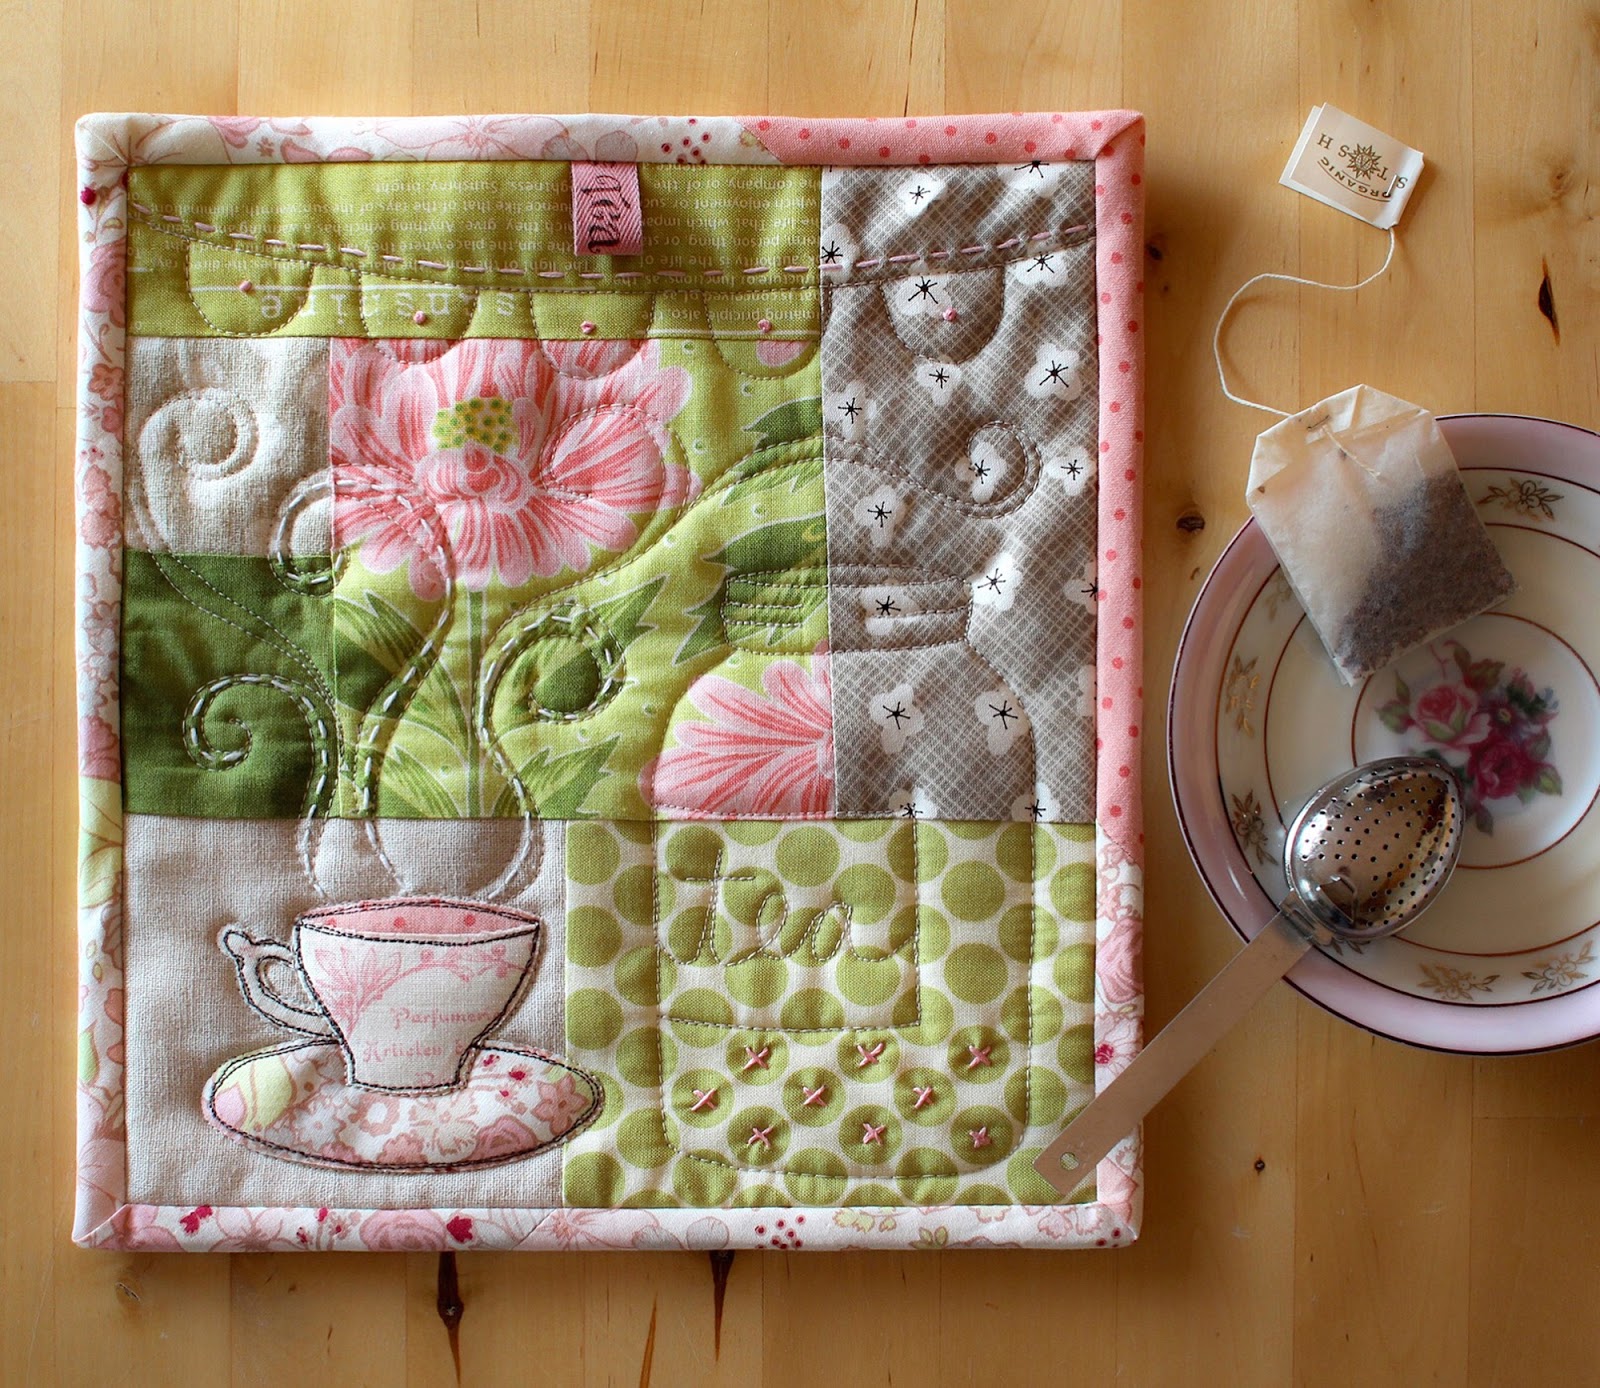

I was inspired by the colours of my Japanese jelly beans. I dove into my scrap baskets and embroidery floss to find matching greens & pinks. Inspiration soon struck, and a little teacup needed to be added! I decided to make a log cabin centered around this cute bunny fabric I found.


I spent a day or two trying to decide how to quilt it. I knew I wanted steam but steam everywhere would have looked a bit strange. I decided to turn it into a drawing a free-motion quilt a background image around the teacup appliqué. Not trusting my rusty free-motion skills, I drew the images on thin tracing paper first, pinned it in place, and quilted right through the paper. It was easy to follow the lines, I could see clearly, and I wasn't distracted by busy fabrics.

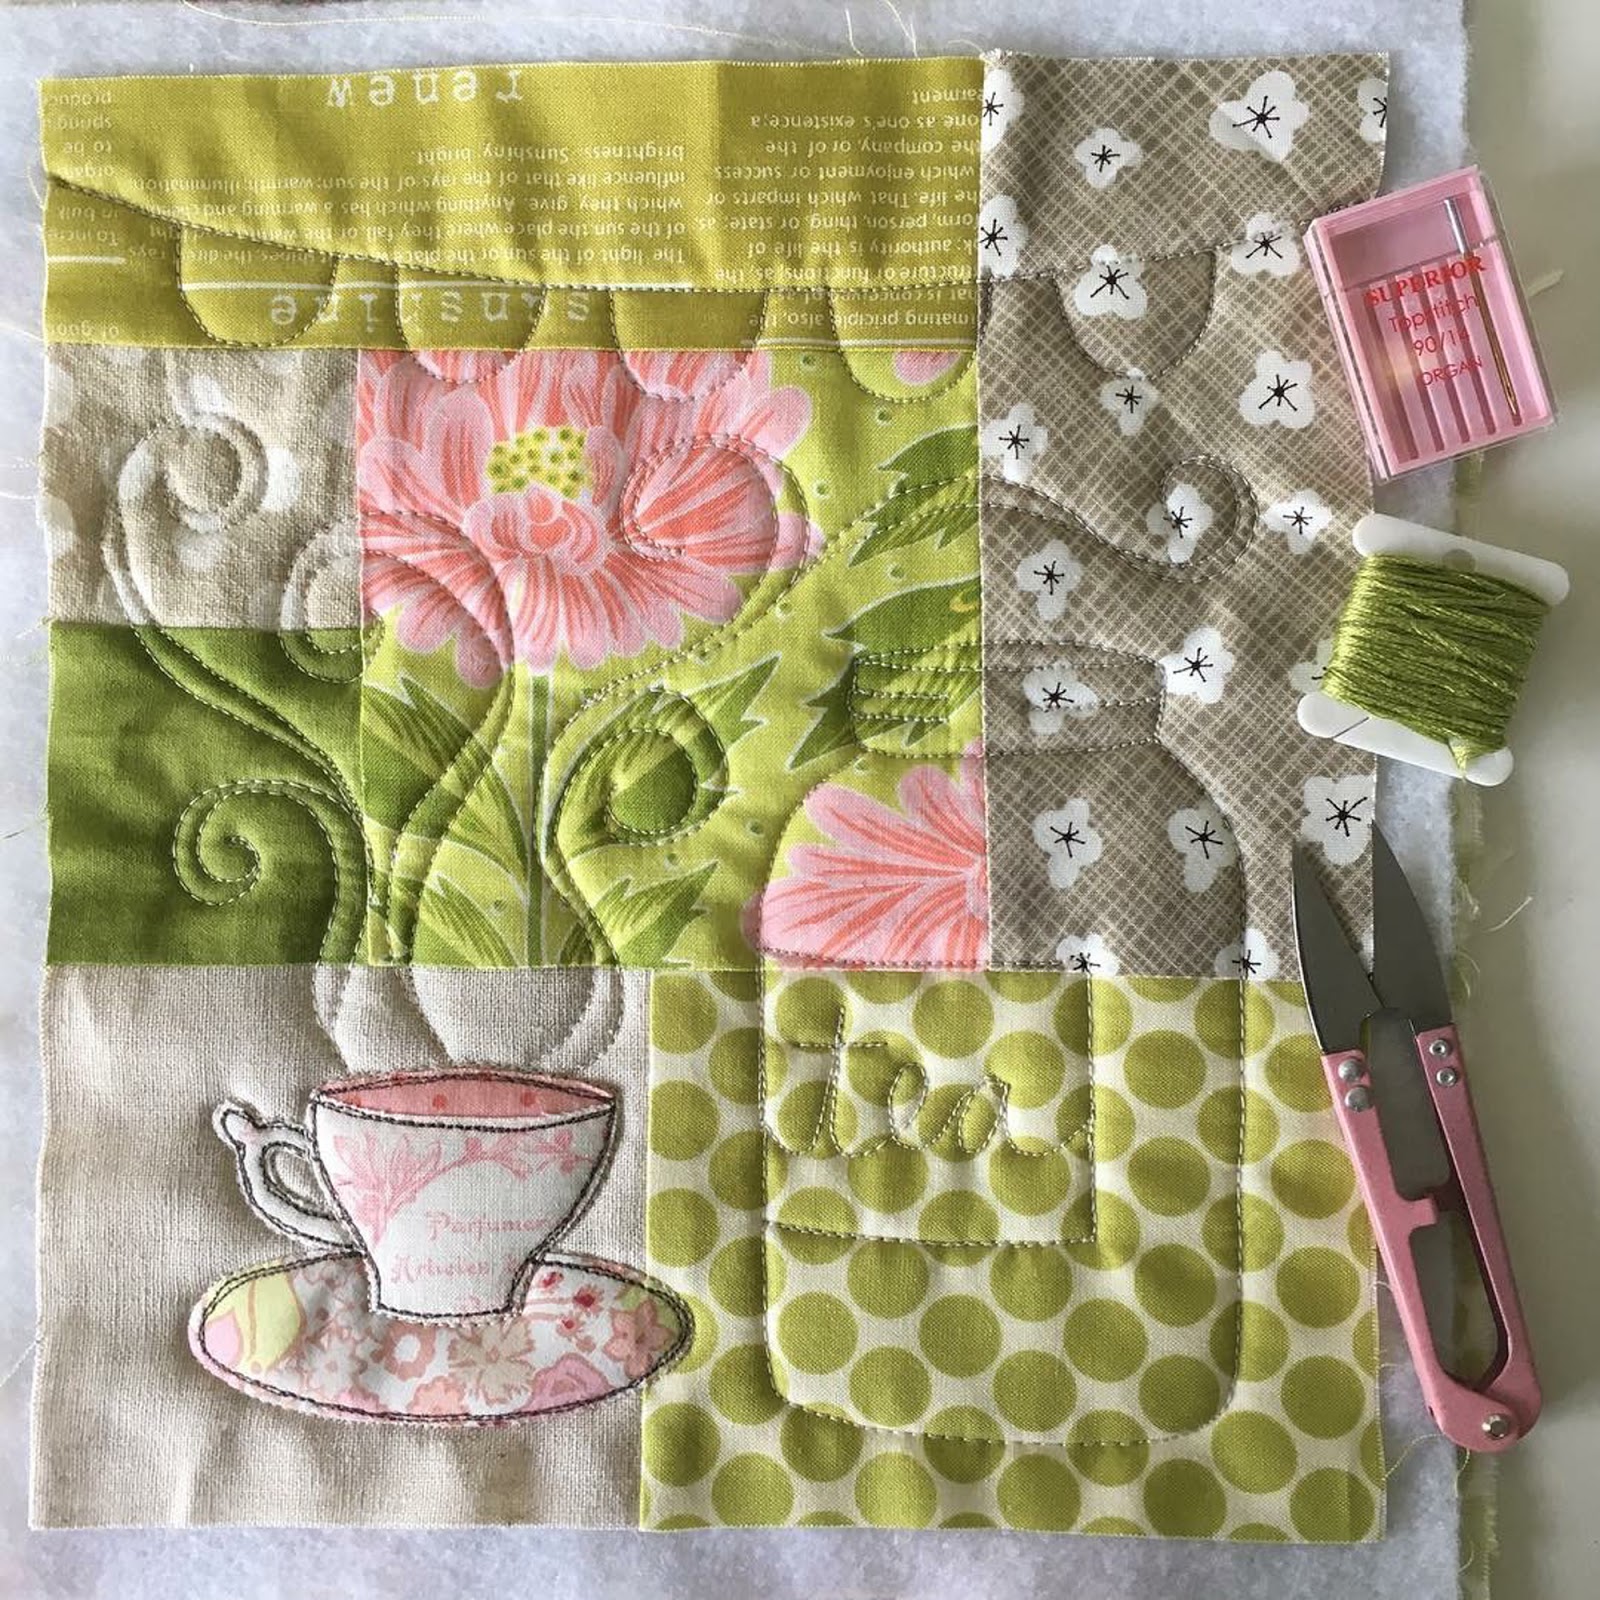
I love details...
I try to add a little bit of ribbon, buttons or embroidery to everything I make. I usually add embroidery after quilting rather than before. I started with the steam and just kept going and going but I had to force myself to stop before I went overboard! I added a touch of this lovely Tea Time ribbon that my friend Anna made.


My friend Sonia left the above comment on my instagram. Depending on the light, the jar and all other quilting disappears and reappears making this a truly magic Jar of Tea!
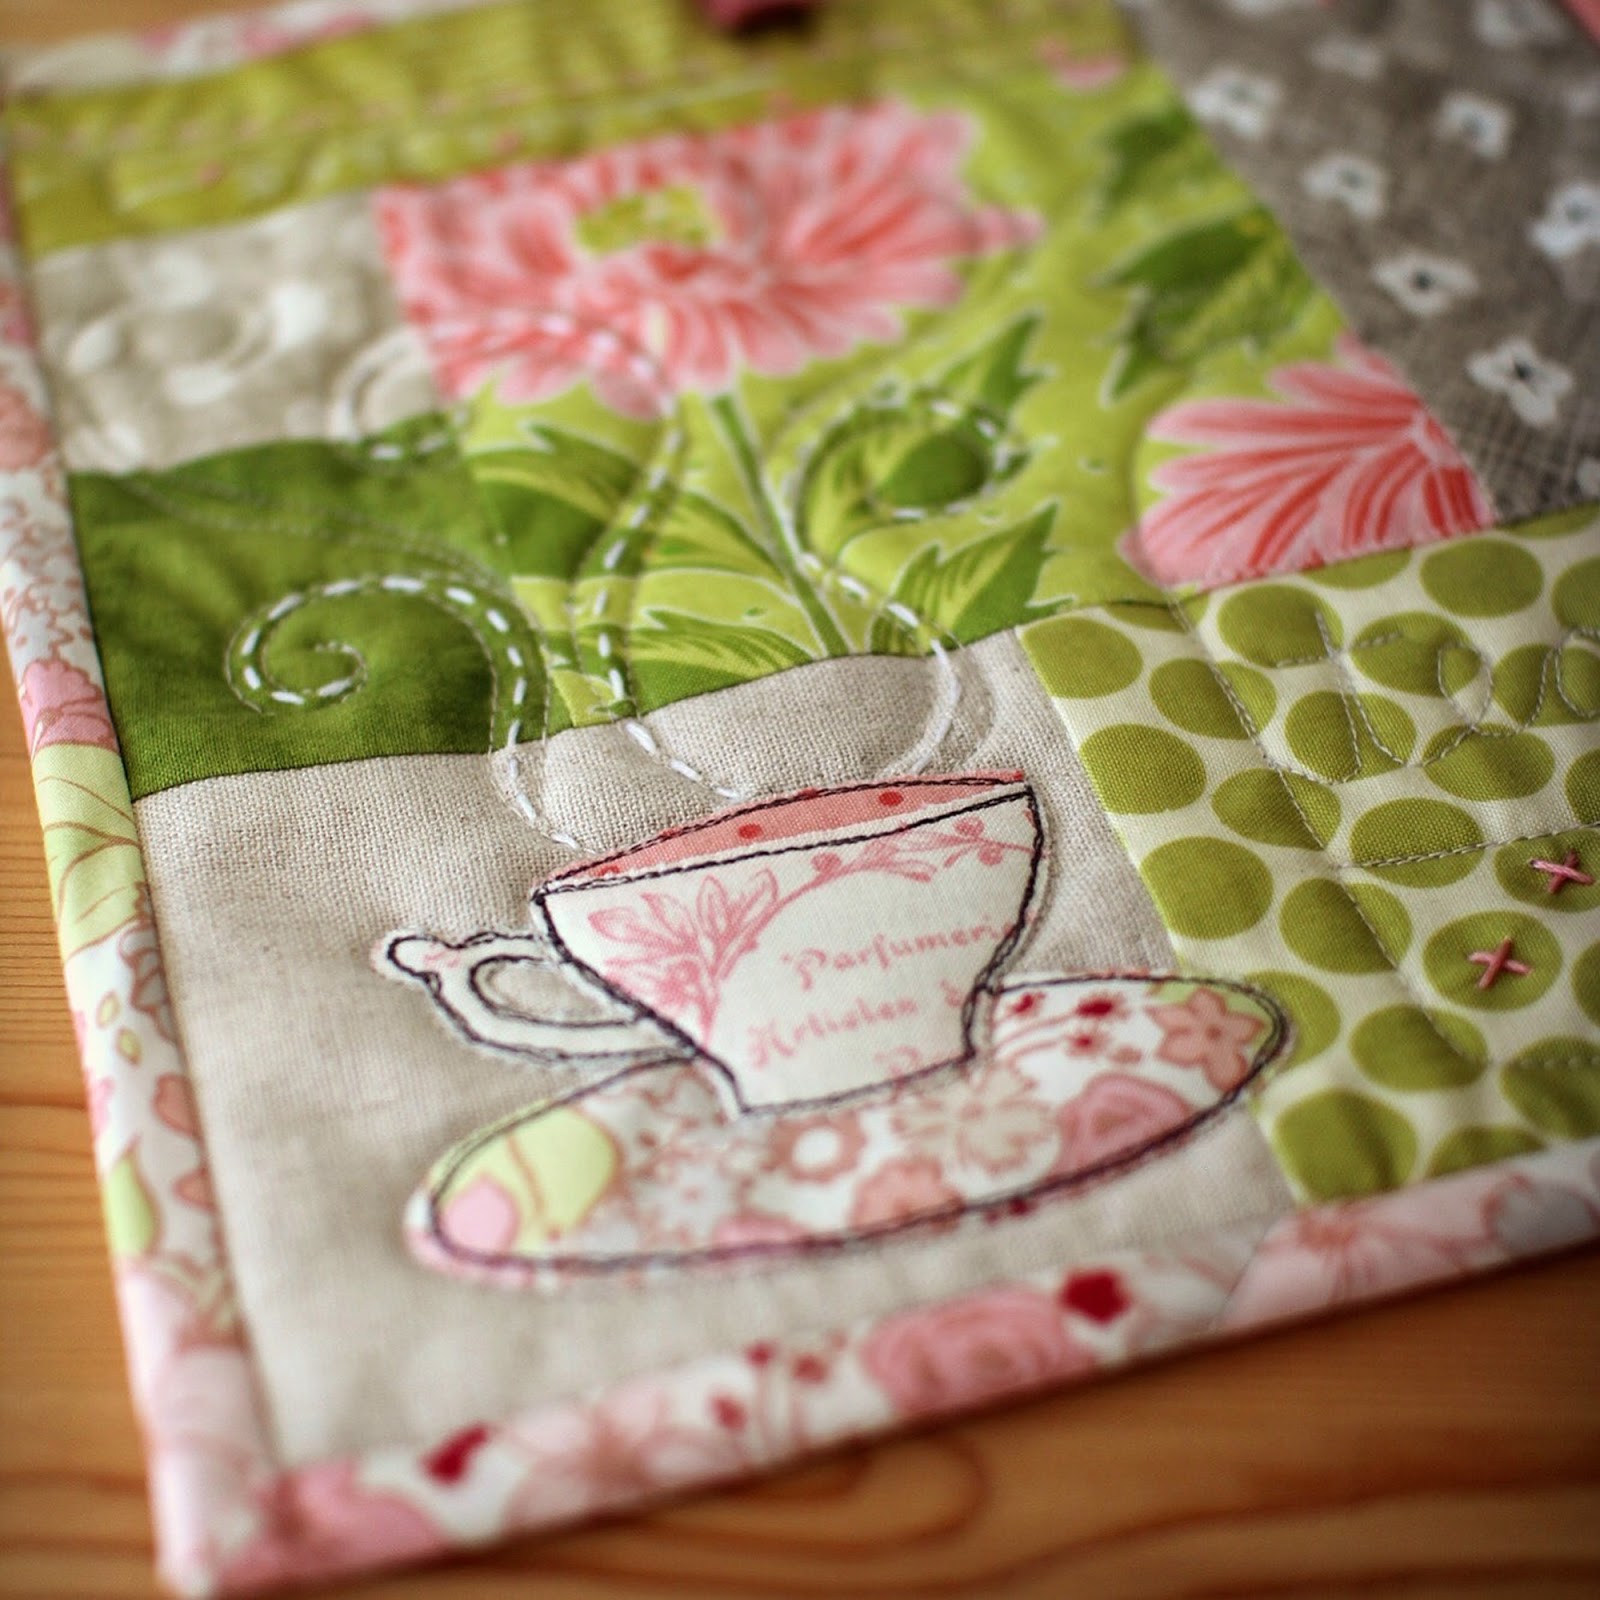

Where did it go?!
My blog posts tend to be a bit behind. To keep up to date with what I am working on, follow me on instagram and facebook.

Dear Blog,
I know I haven't posted in a while. Thank you for the reminder yesterday. It seems that you can't wait for me any longer and have decided to post all by yourself. I would be thrilled but I doubt our subscribers wish to read a re-post from August 2015. As much as I appreciate the extra help, please allow me to do the posting from now on. I promise to visit you more often! I have not forgotten about you.

The longest creativity slump of my life has finally come to an end. This Summer I played a lot in the garden, baked, went about the normal routine of keeping house & having friends over tea. However, when I opened my sketchbook or sat in front of my sewing machine my mind drew a blank.
n o t h i n g . . .

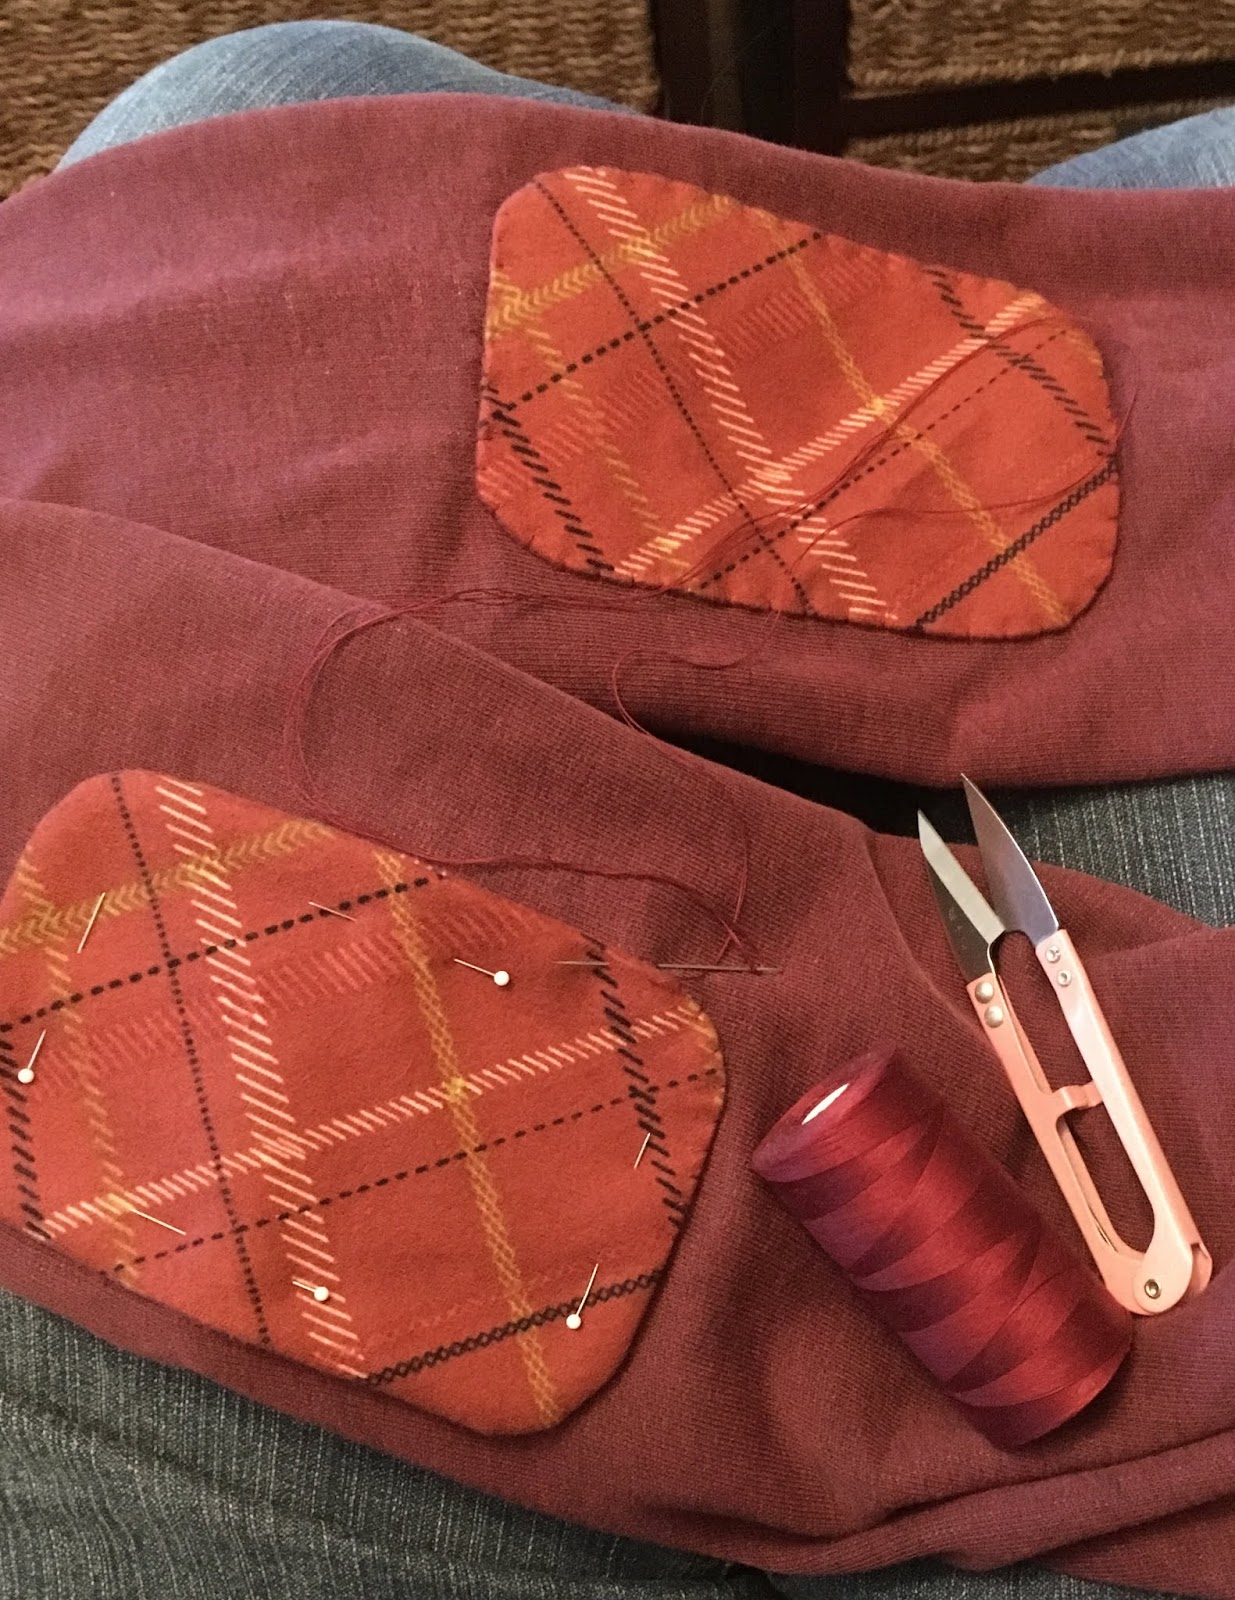
Last month, the simple act of sewing some plaid elbow patches to my teenager's newly thrifted hoodie was enough to tug those creative strings. I decided to take a photo and share it on instagram even though it wasn't a very exciting project, and was motivated not only by the number of people who liked the elbow patches but by my creative friends who had missed me.
I spent the last couple weeks dabbling with some fusible web appliqué, sketching a few new ideas to add to my giant heap-o-designs, and learning more about instagram. I even had to ask my teenager about hashtags & stories!
I will be posting new stuff as well as a bunch of half-written ancient drafts still sitting in my posts section. I post more frequently on facebook & instagram. Search for patchworkpottery.
It's that time of year again. School is out for summer break in a week! I finally finished all the Pencil MugRugs for Claire's teachers plus one more for my sample bins. I hope Claire's teachers like them. You can find the pattern in my SHOP.
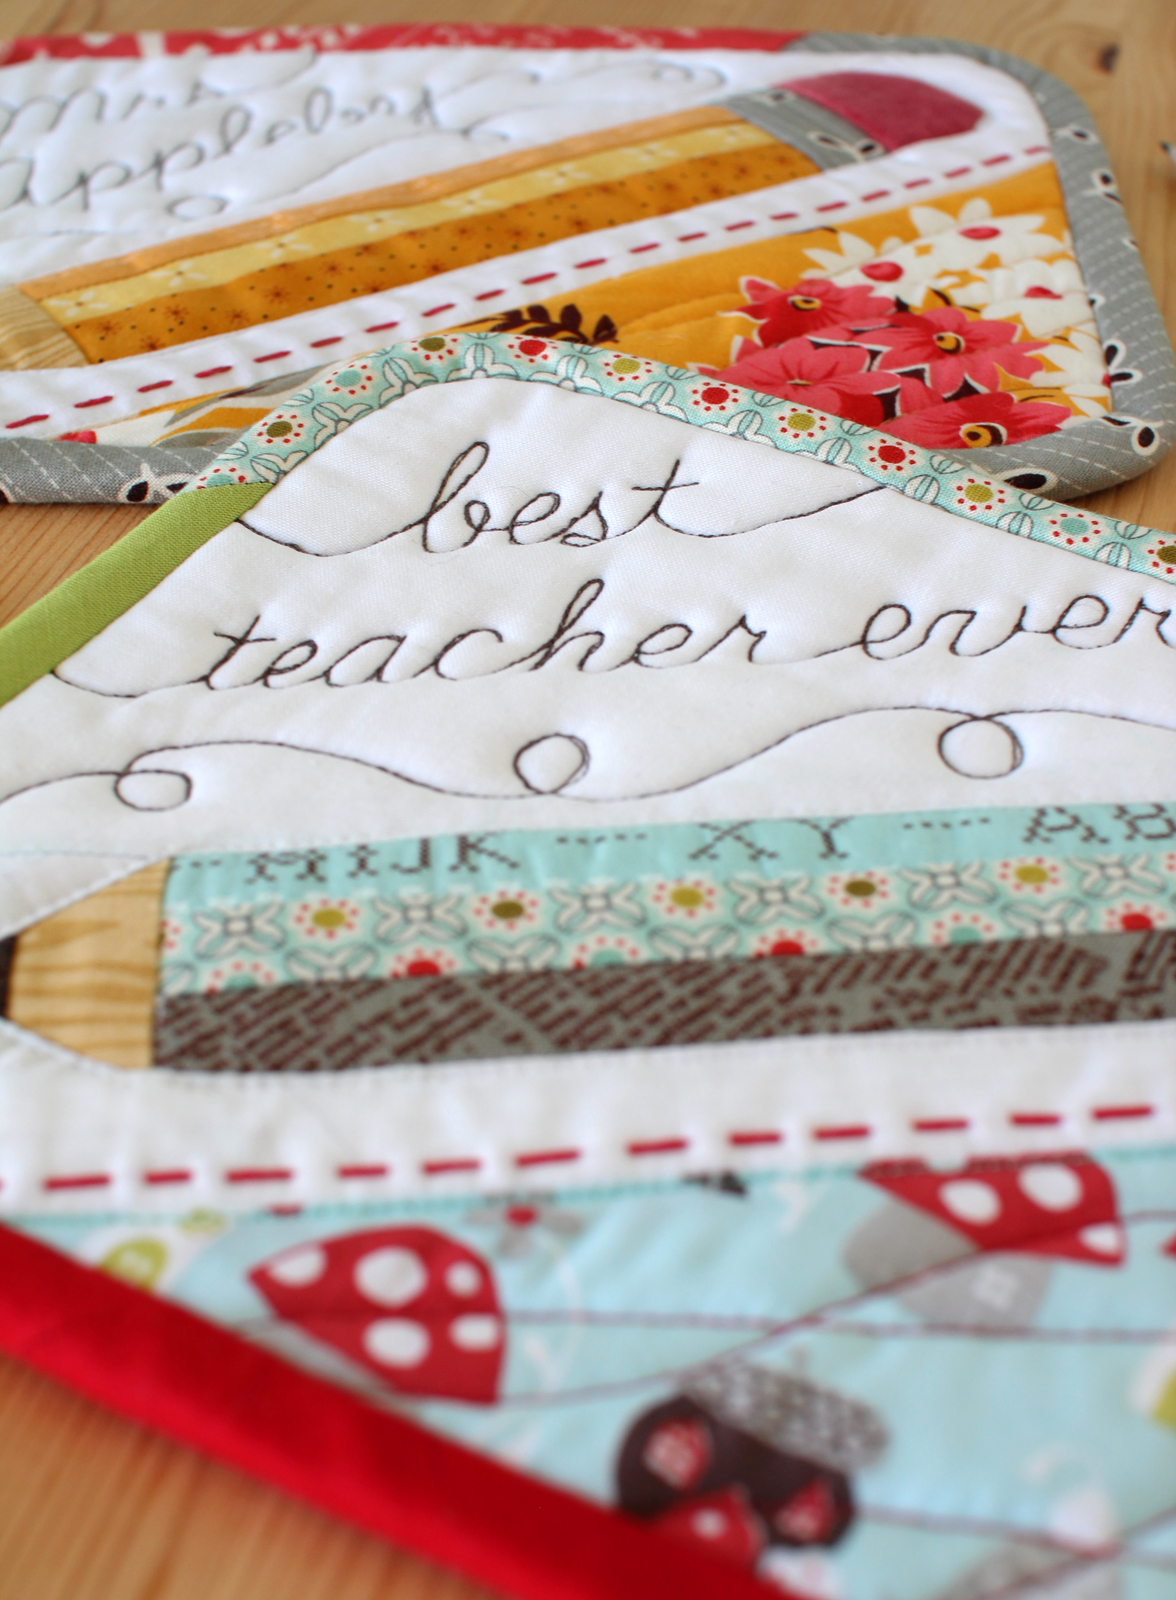
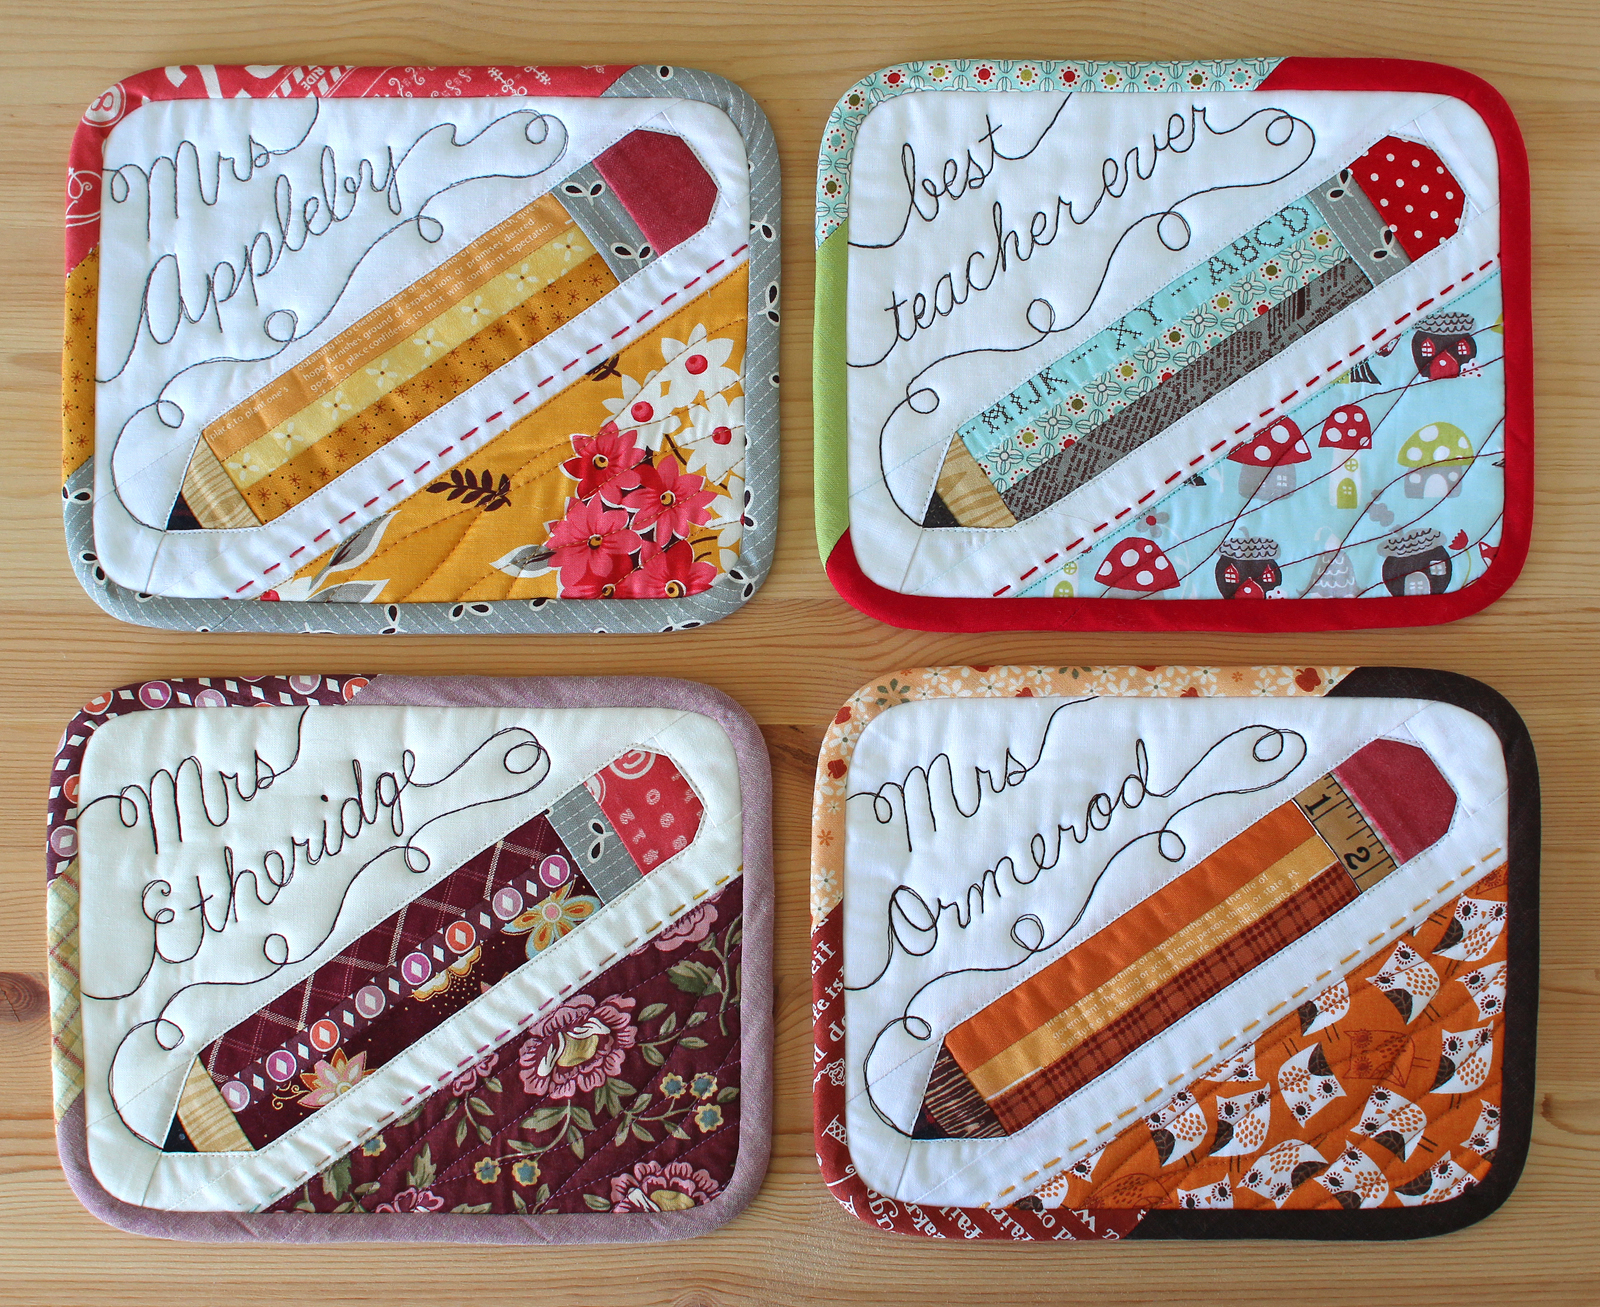
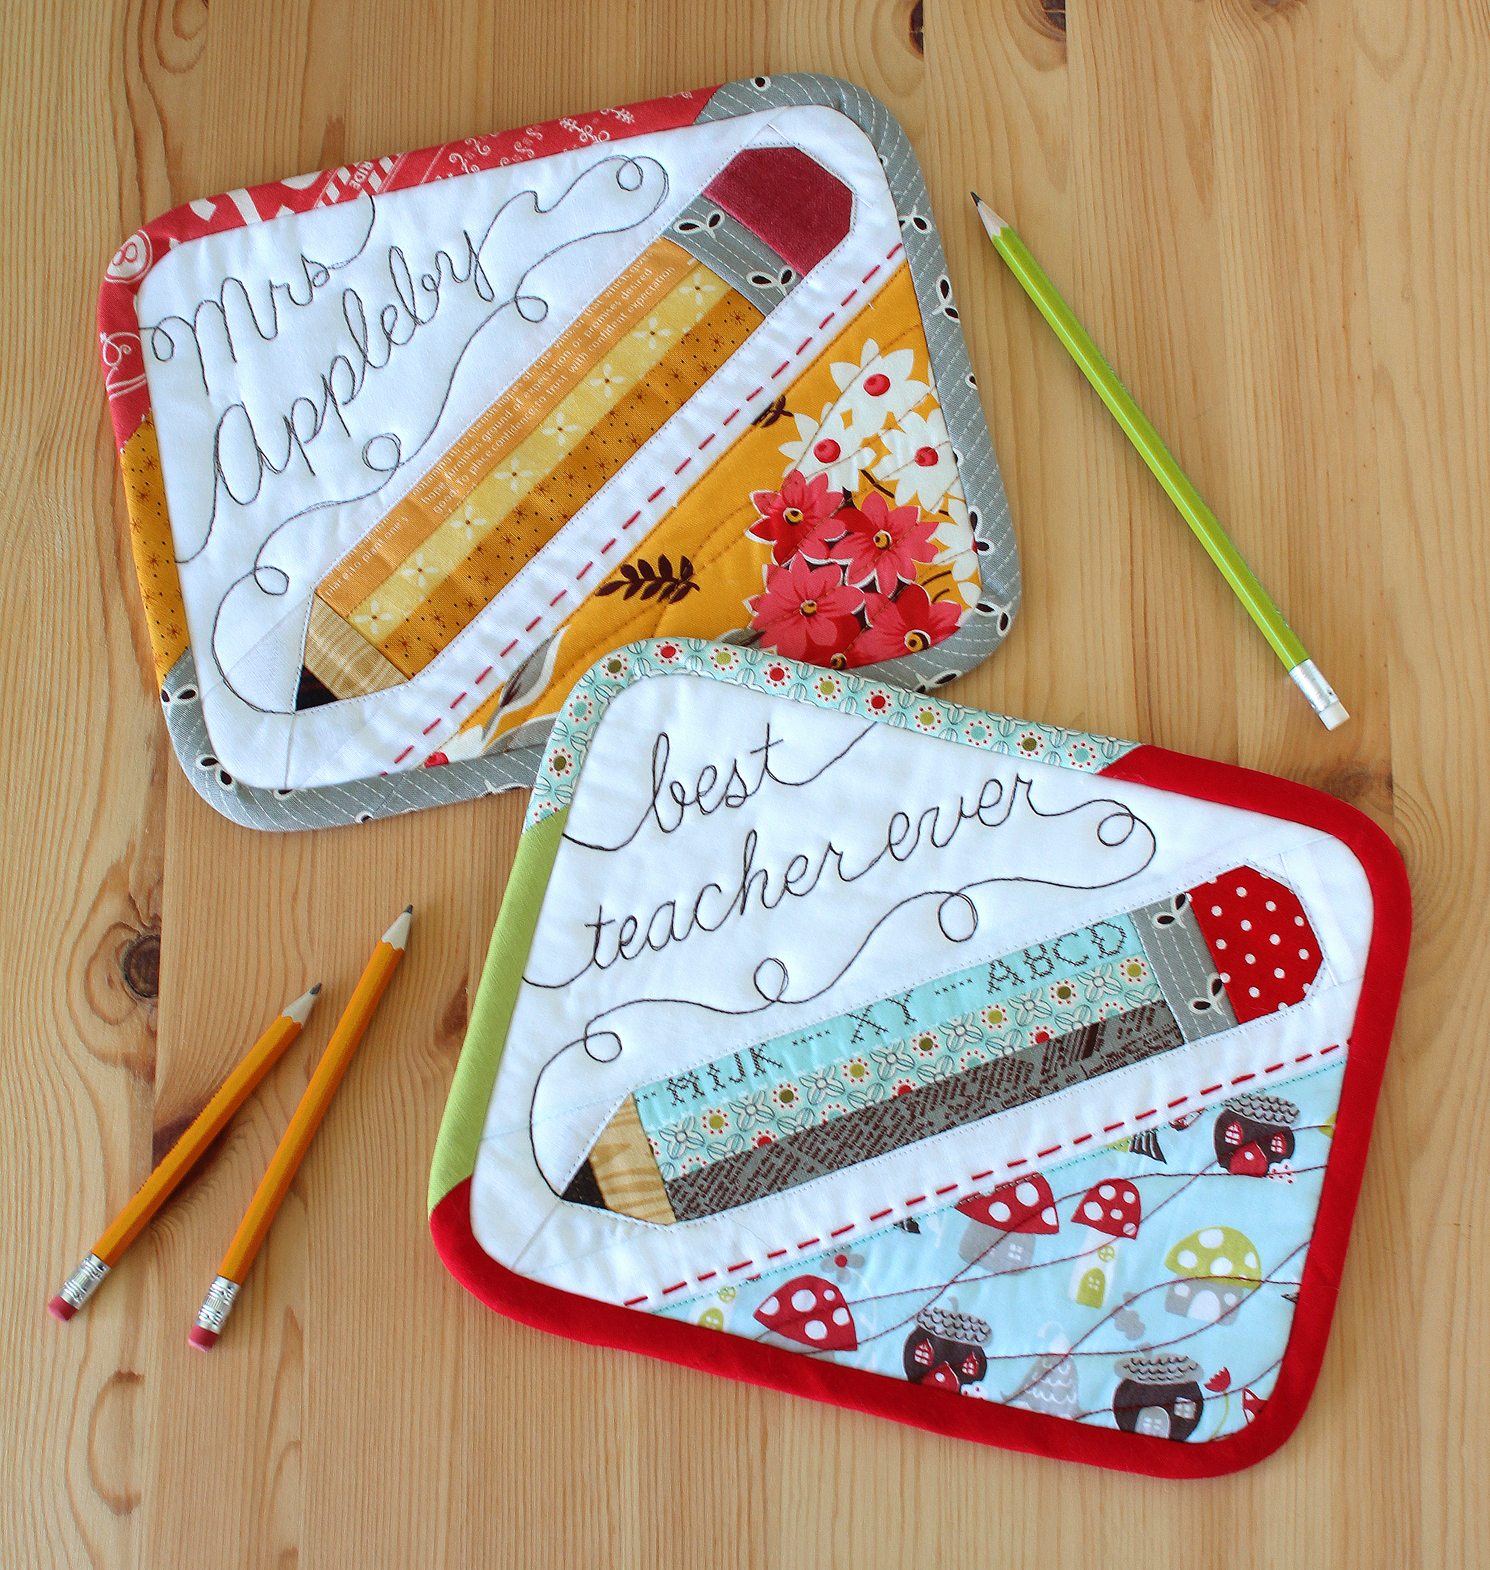
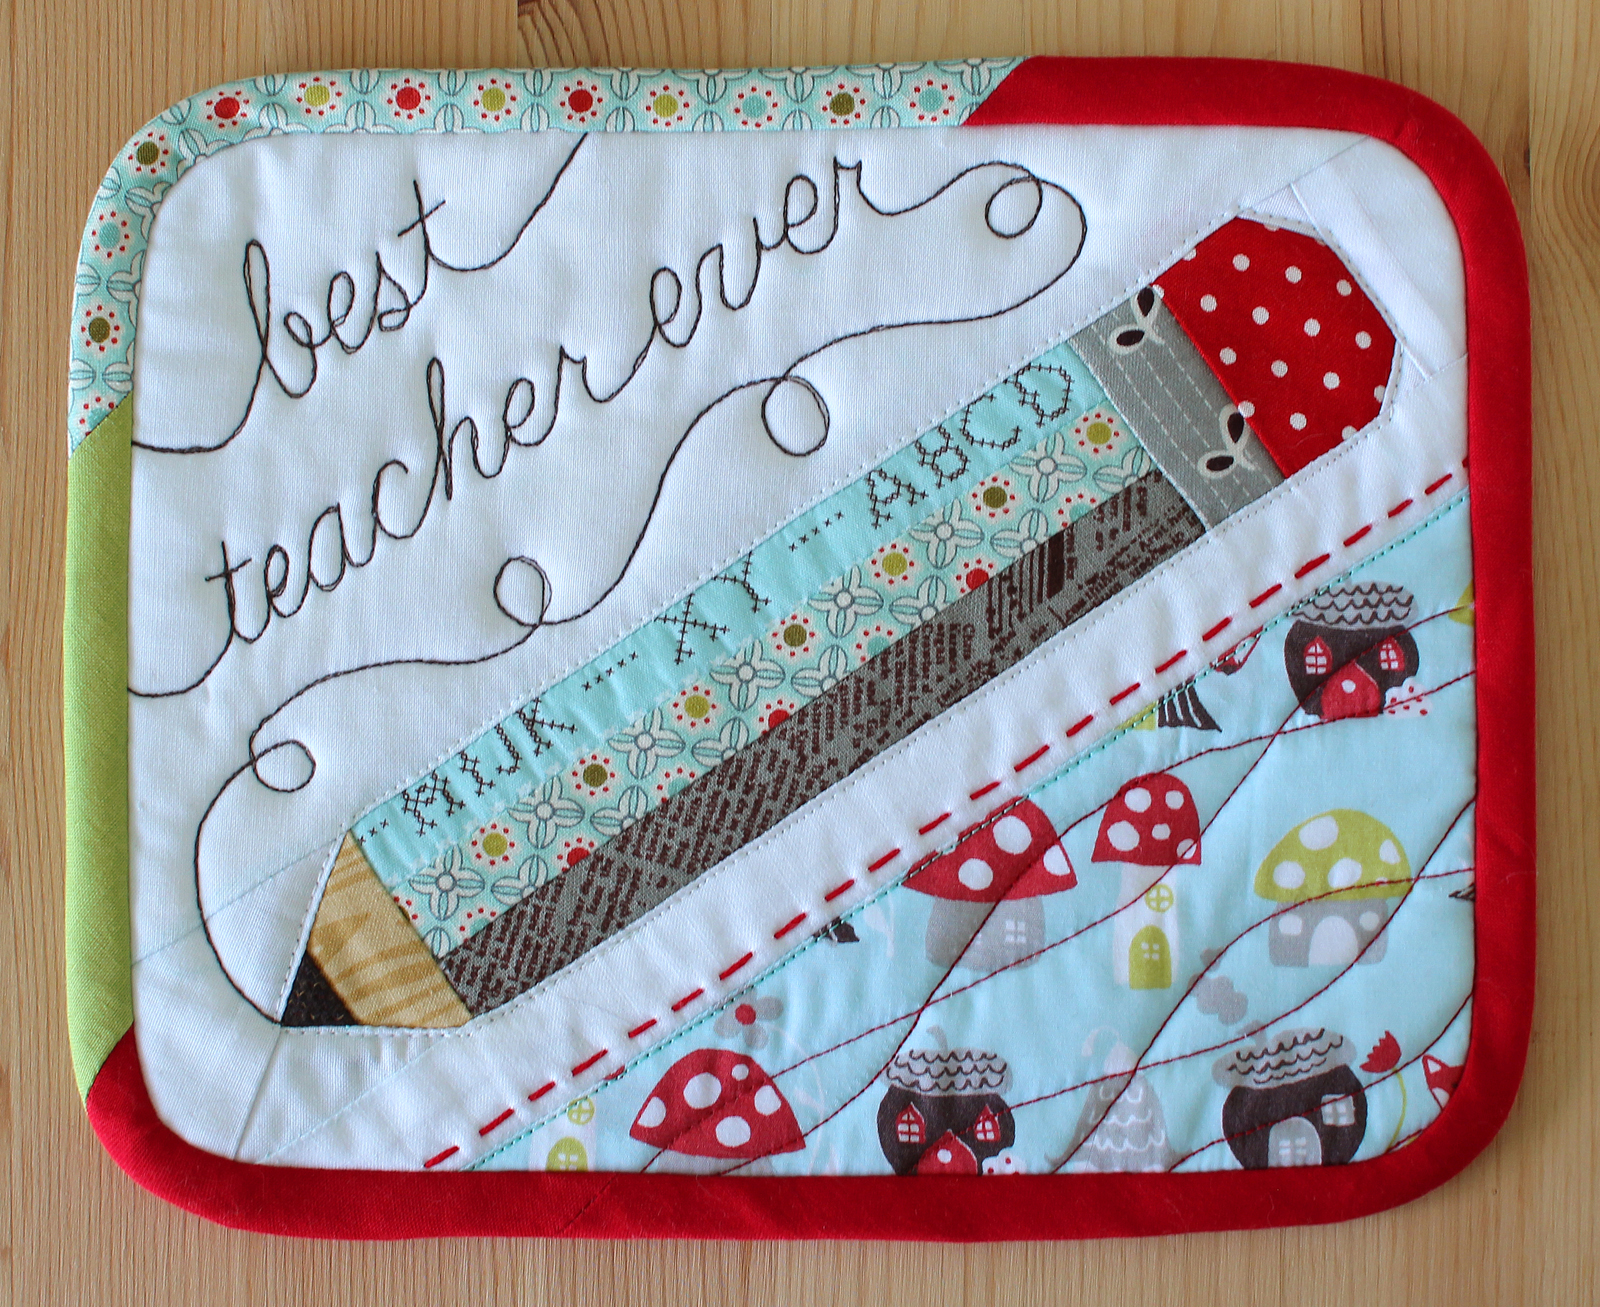

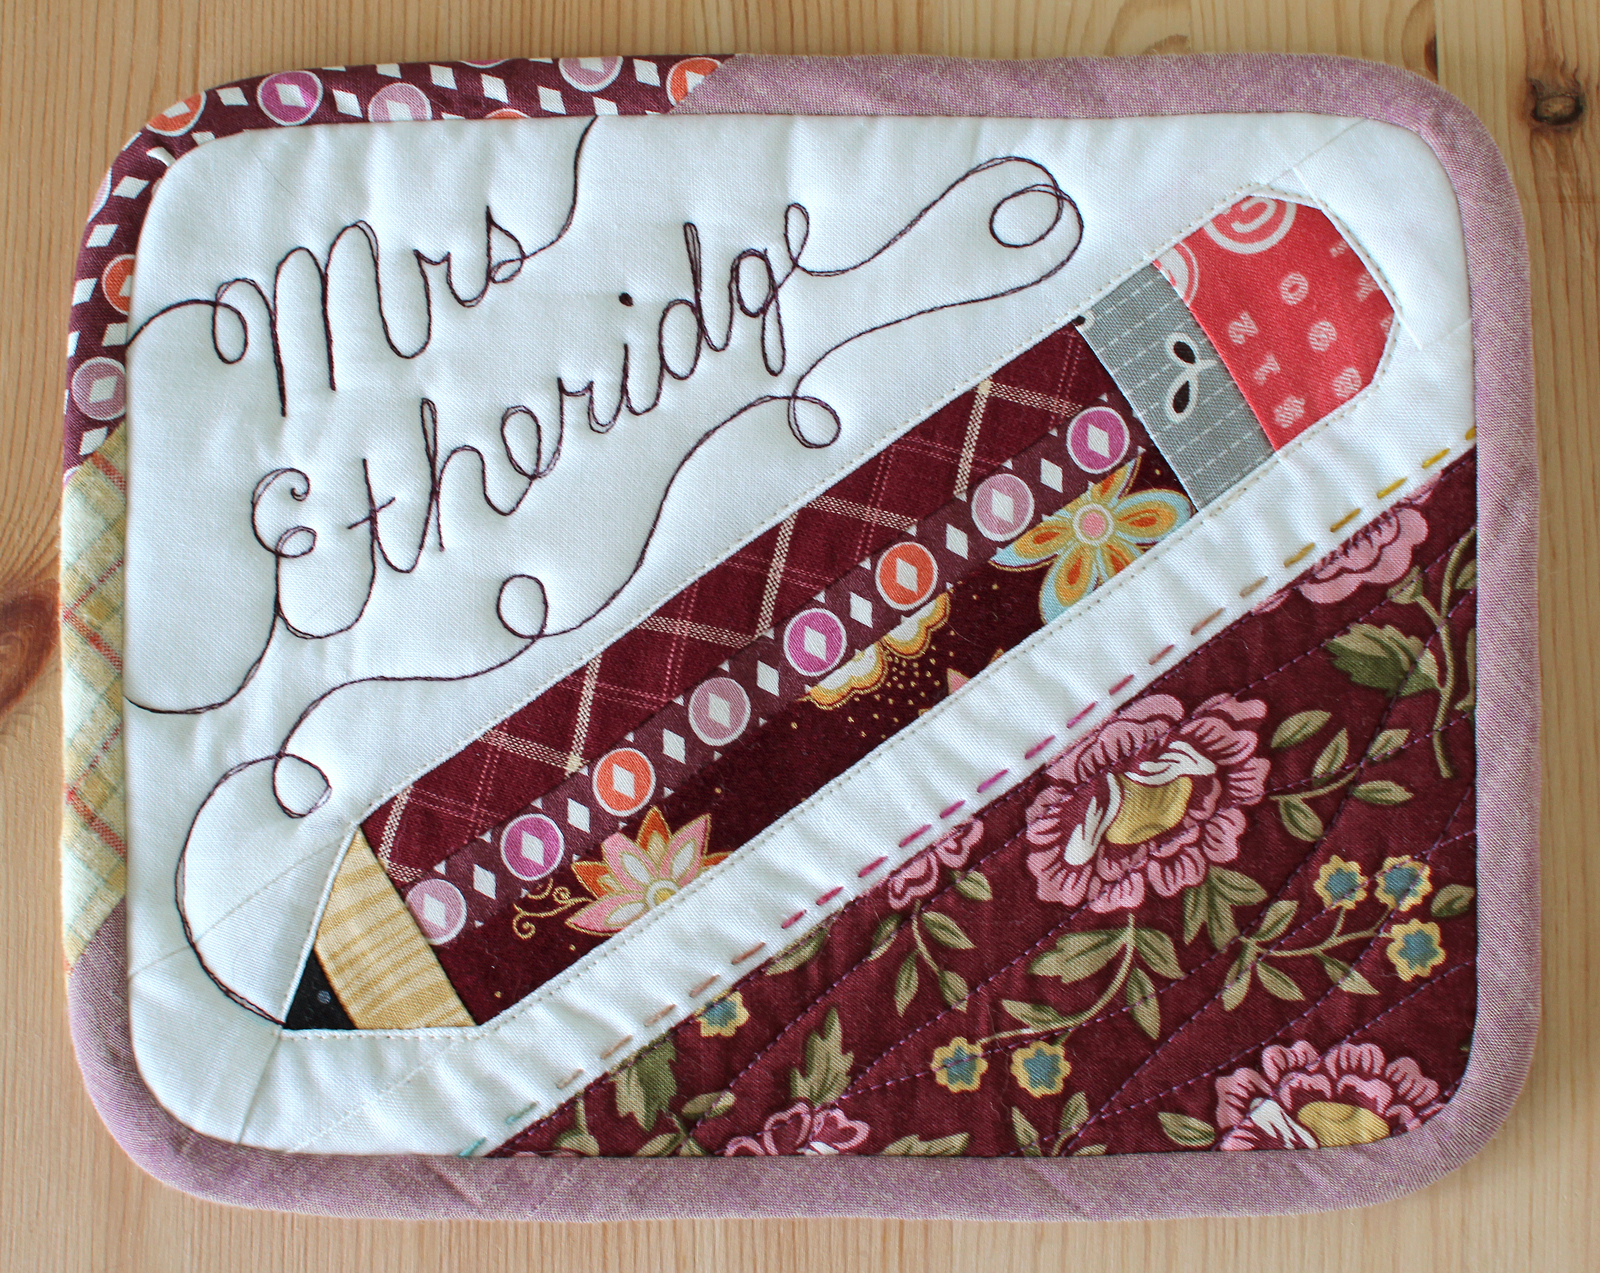

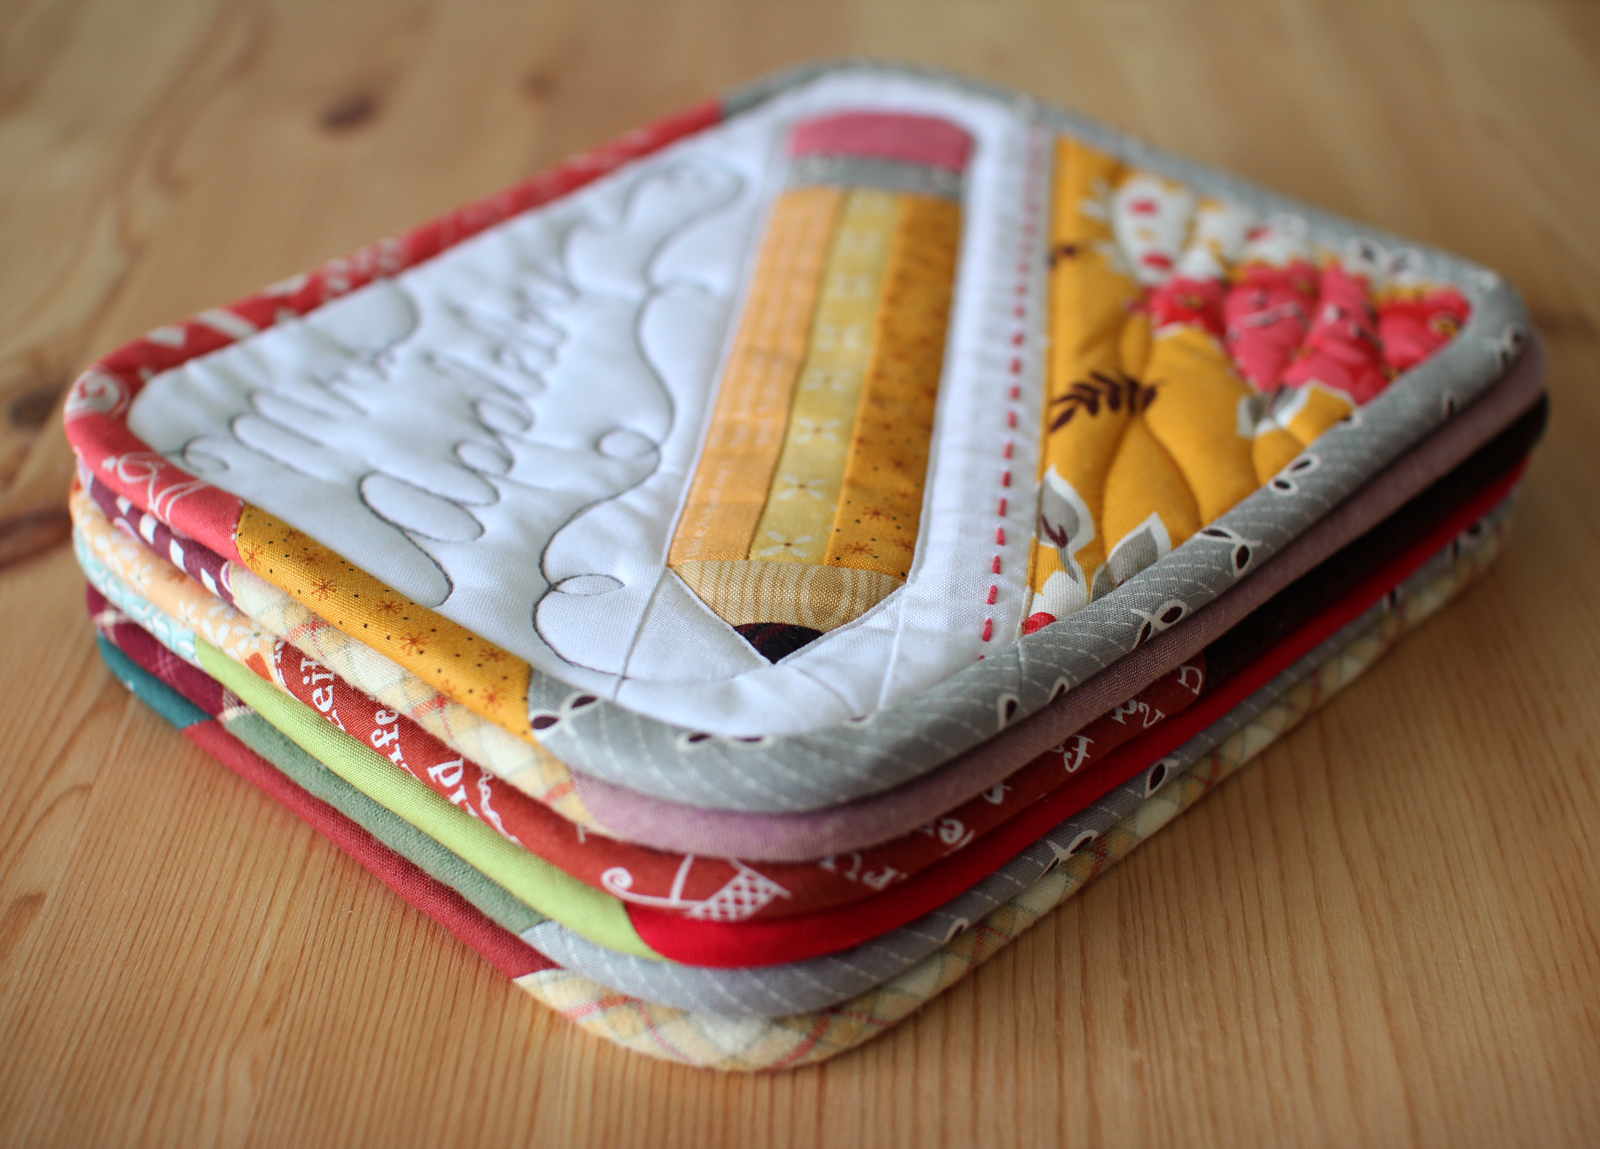
See more pictures and read more about Pencil MugRugs HERE.
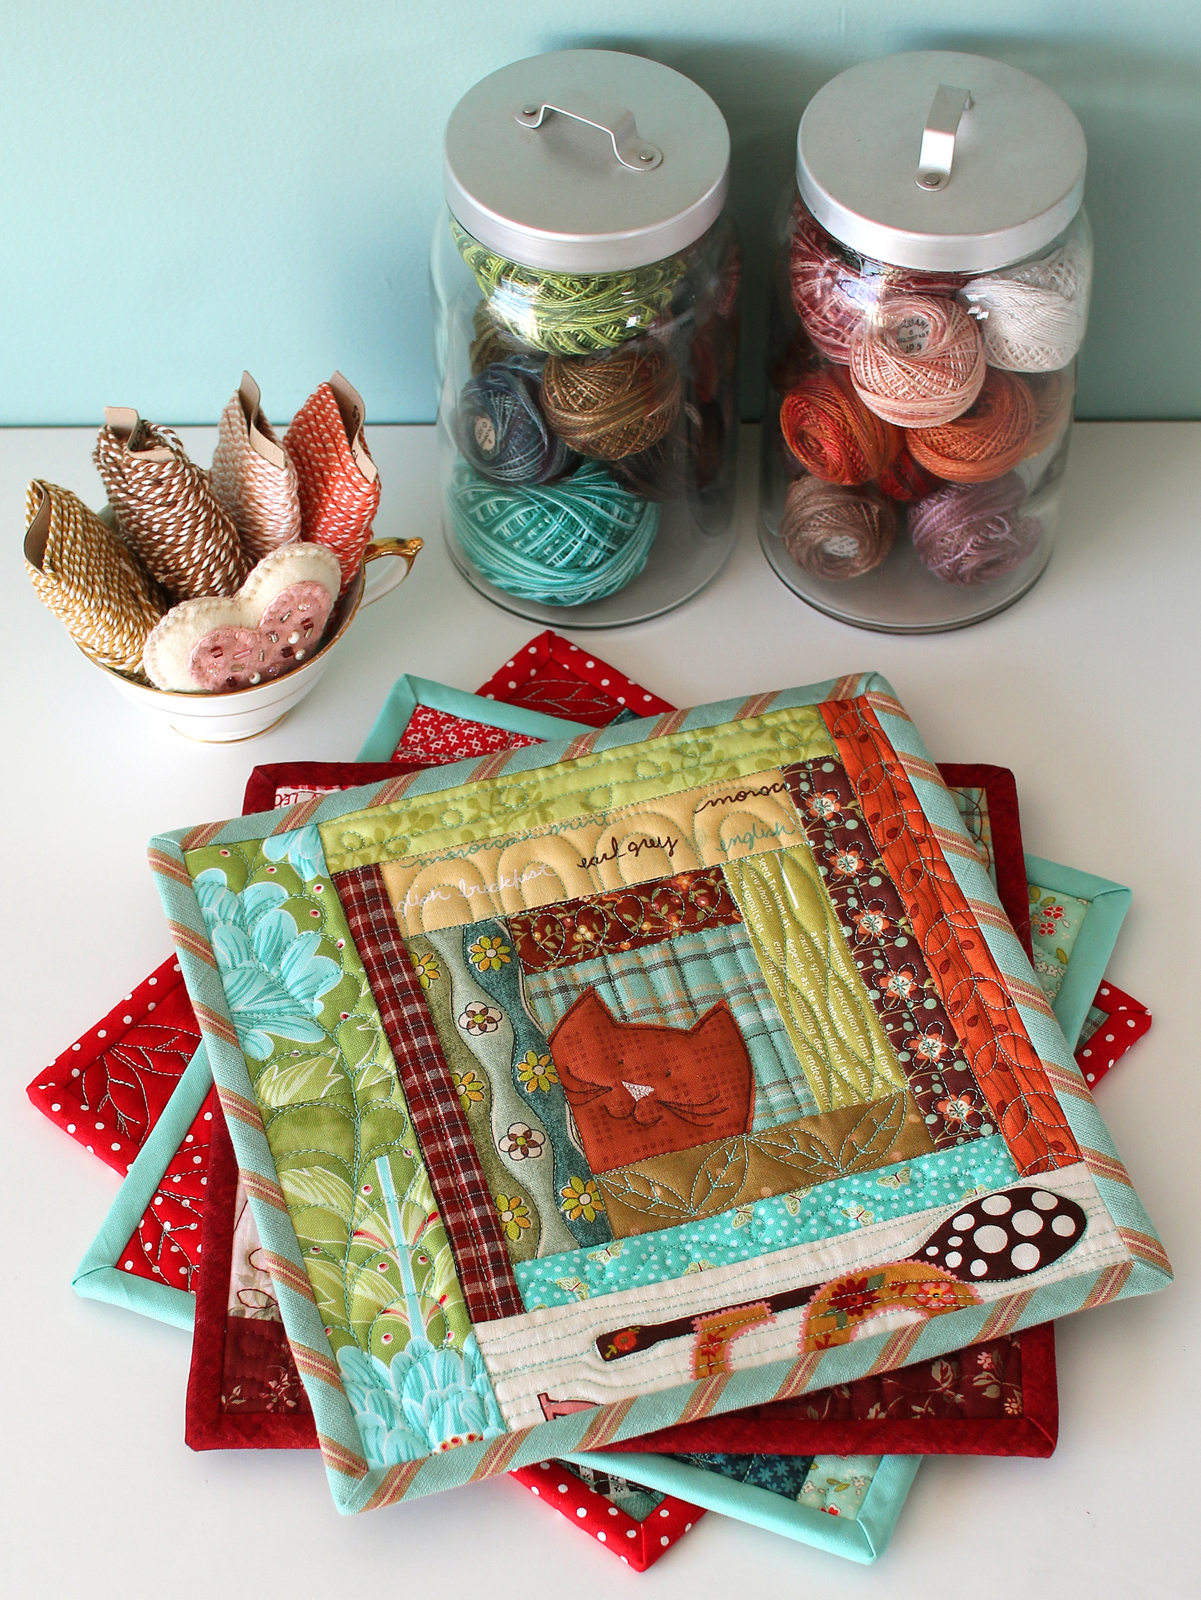
Kitty Potholder digital pattern booklet is now available in my SHOP.

Kitty Potholder pattern adds a simple fusible web appliqué and varying strip widths to an otherwise traditional log cabin block to create a playful modern design. Makes a 10-1/2" square potholder or a 10" square block.
Small projects are perfect for practicing your free-motion quilting. Use an overall design or practice a different one in each section.
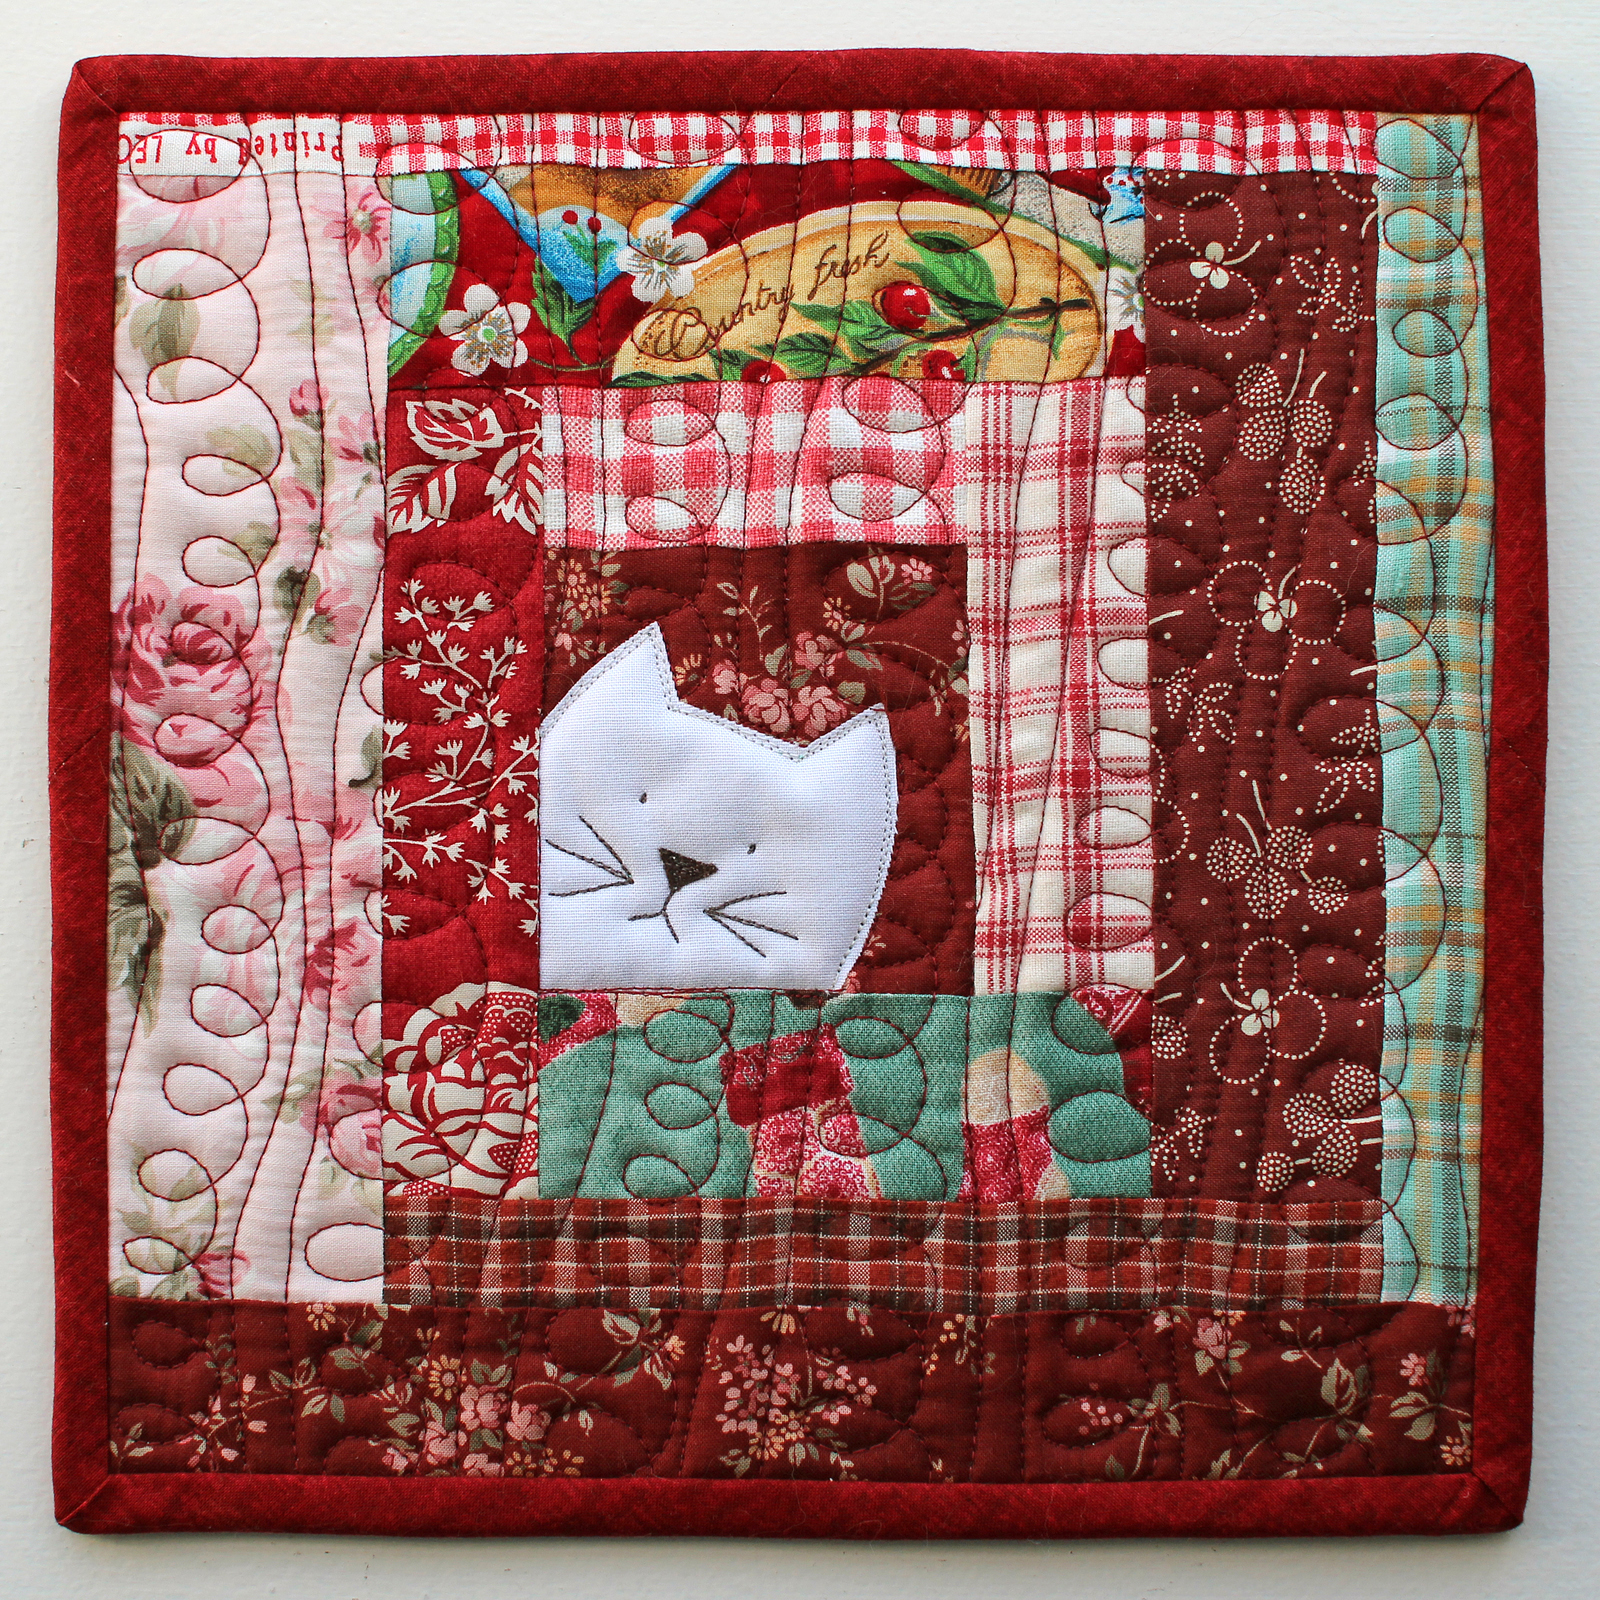

Make a potholder or two, or create an entire quilt using this block. This is a fantastic way to use up all those fabric scraps. Perfect for all those cat lovers out there! Read more about Kitty Potholders in this post.
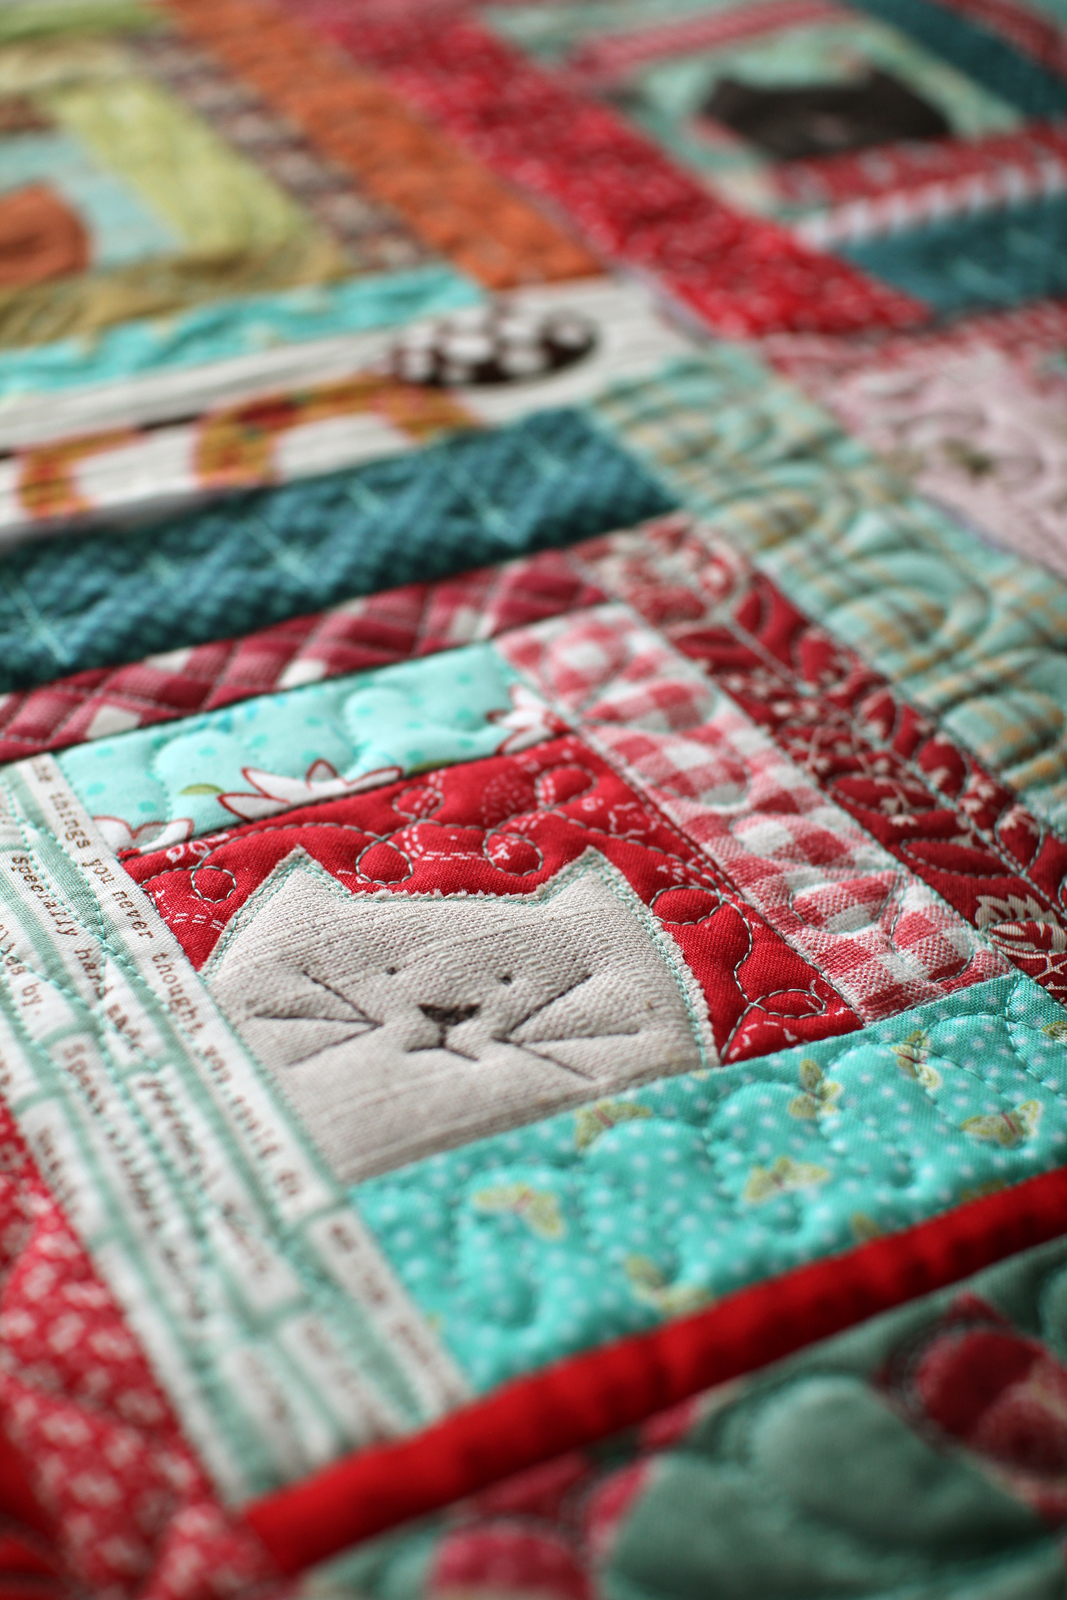
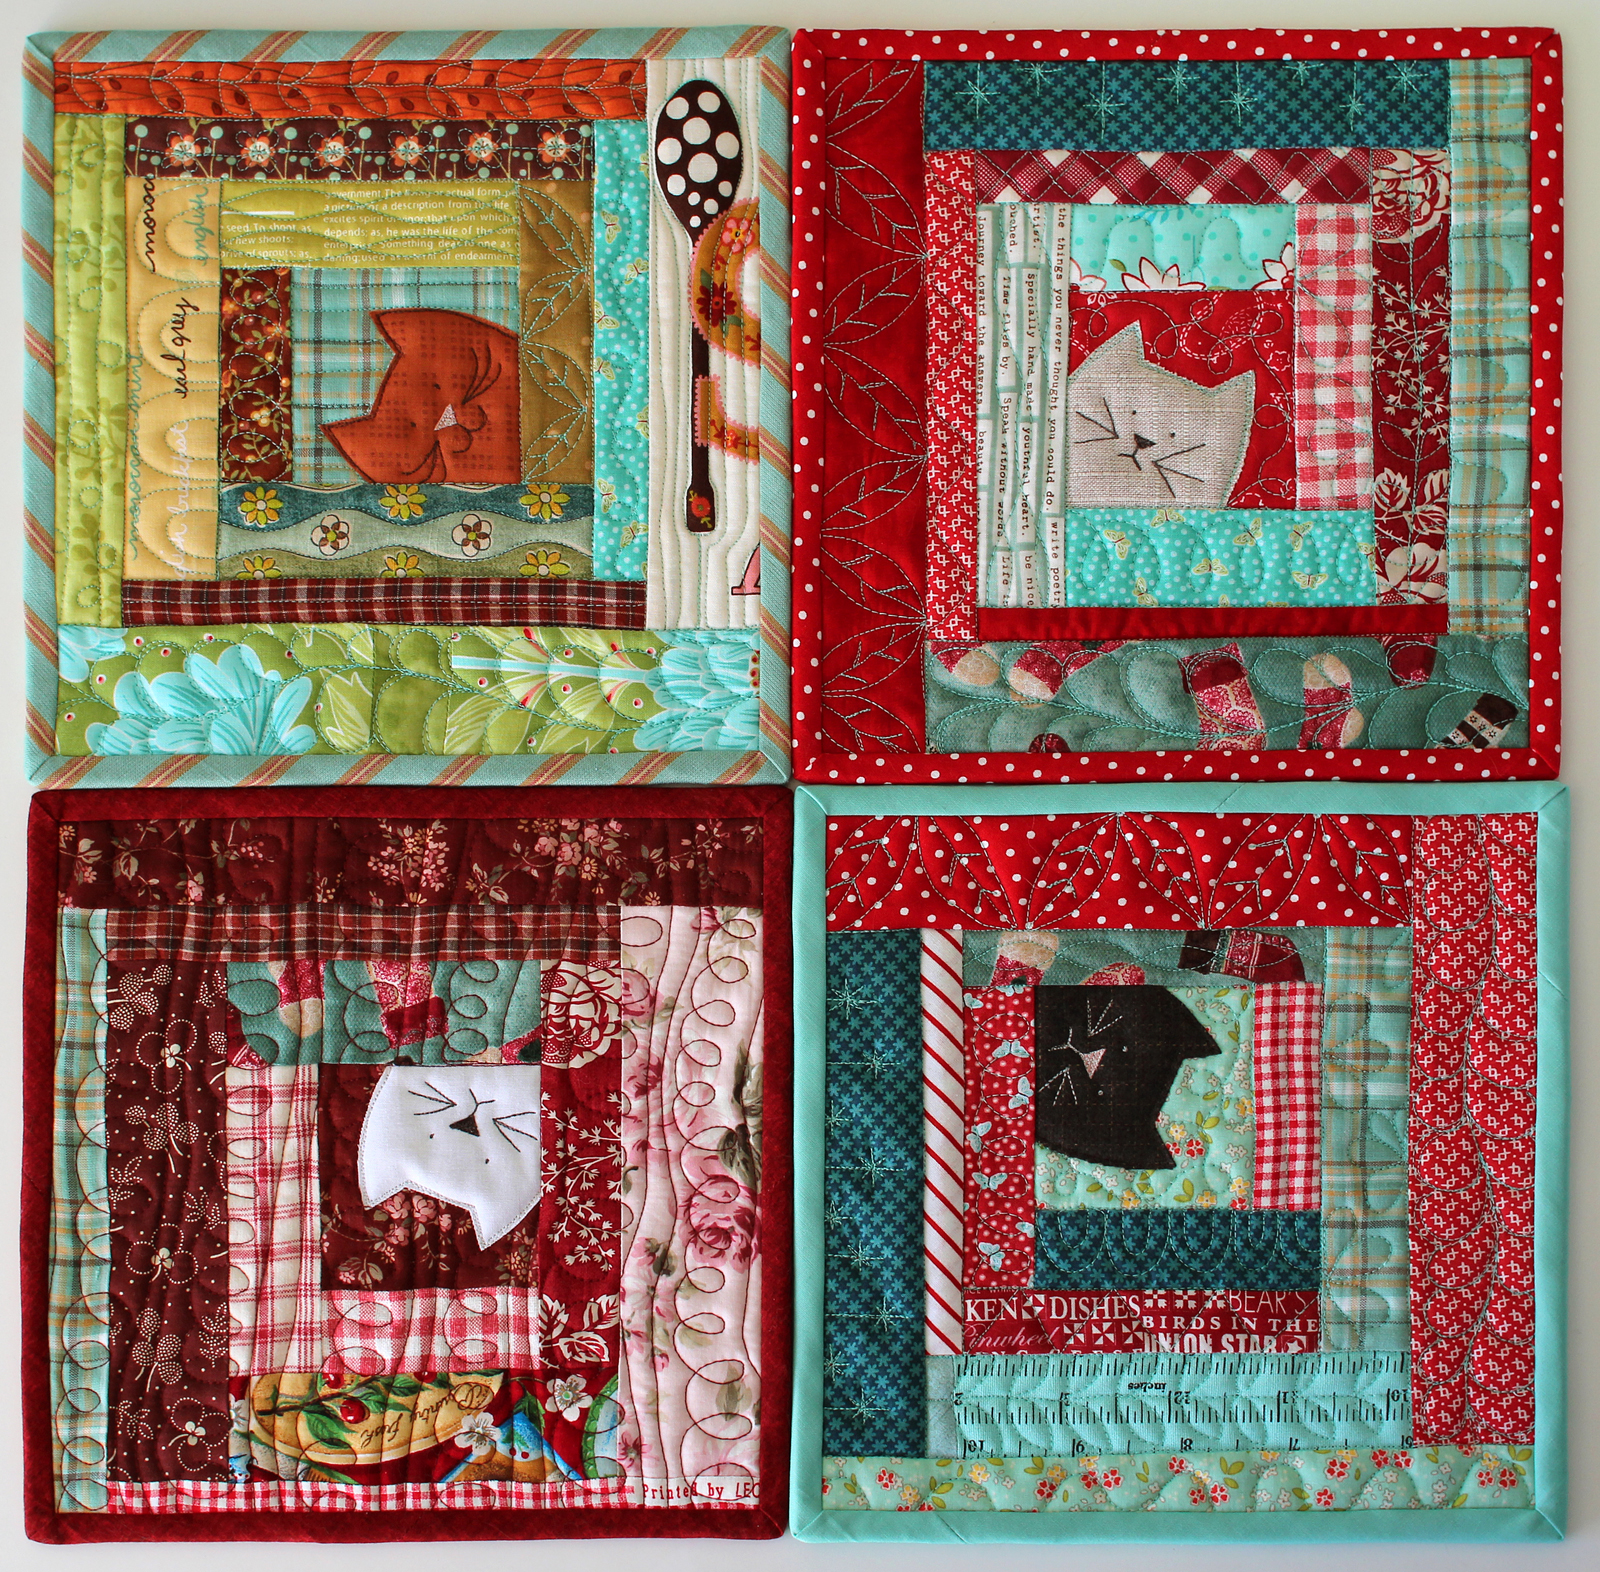
Download this digital PDF pattern, print it out, assemble it into a little pattern booklet, and have fun sewing! PatchworkPottery patterns include metric conversion chart, stitches & terms section, illustrated step-by-step instructions, and full size templates.

Buy a digital pattern and start sewing today!
